6 Managing Dashboard Users and Roles #
Dashboard user management performed by Ceph commands on the command line was already introduced in Chapter 14, Managing Users and Roles on the Command Line.
This section describes how to manage user accounts by using the Dashboard Web user interface.
6.1 Listing Users #
Click ![]() in the utility menu and select .
in the utility menu and select .
The list contains each user's user name, full name, e-mail, and list of assigned roles.
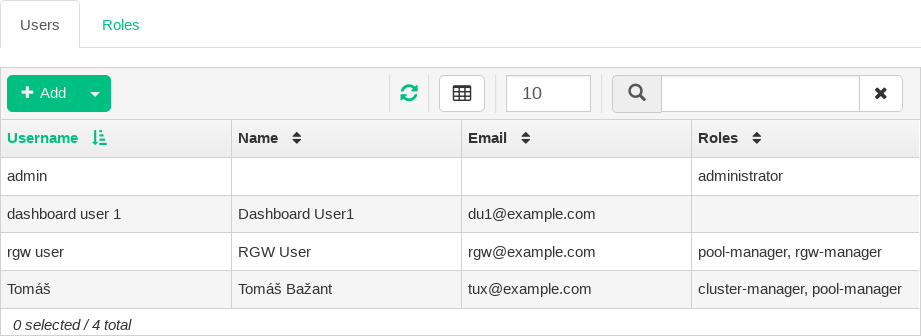
Figure 6.1: User Management #
6.2 Adding New Users #
Click in the top left of the table heading to add a new user. Enter their user name, password, and optionally a full name and an e-mail.
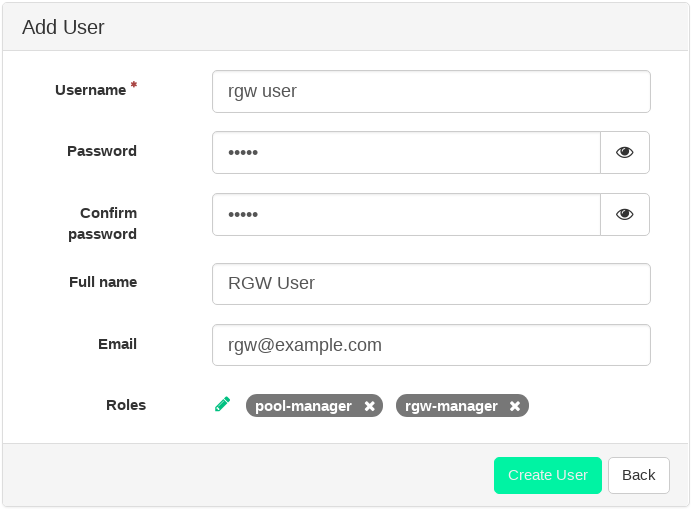
Figure 6.2: Adding a User #
Click the little pen icon to assign predefined roles to the user. Confirm with .
6.3 Editing Users #
Click a user's table row and then select to edit details about the user. Confirm with .
6.4 Deleting Users #
Click a user's table row and then select to delete the user account. Activate the check box and confirm with .
6.5 Listing User Roles #
Click ![]() in the utility menu and select . Then click the tab.
in the utility menu and select . Then click the tab.
The list contains each role's name, description, and whether it is a system role.
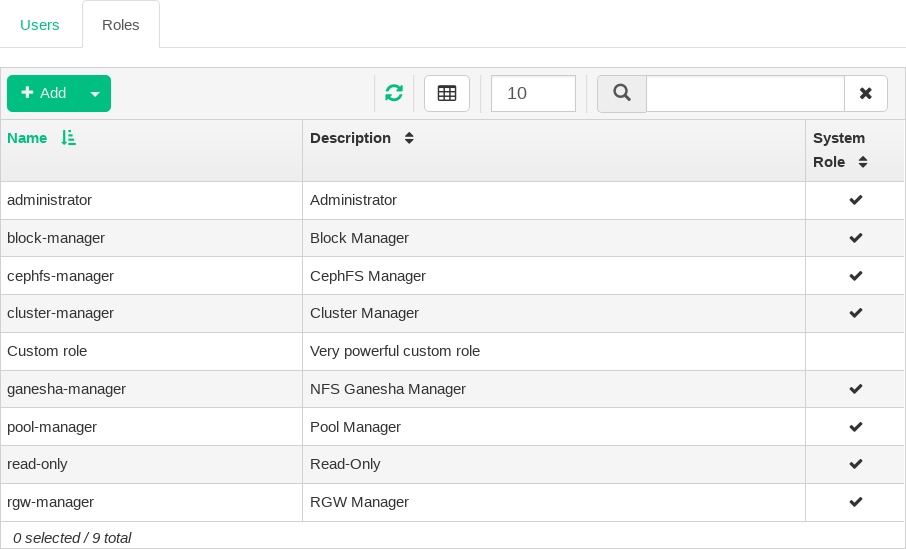
Figure 6.3: User Roles #
6.6 Adding Custom Roles #
Click in the top left of the table heading to add a new custom role. Enter its name, description, and set required permissions for individual topics.
Tip: Purging Custom Roles
If you create custom user roles and intend to remove the Ceph cluster
with the ceph.purge runner later on, you need to purge
the custom roles first. Find more details in
Section 2.17, “Removing an Entire Ceph Cluster”.

Figure 6.4: Adding a Role #
Tip: Multiple Activation
By activating the check box that precedes the topic name, you activate all permissions for that topic. By activating the check box, you activate all permissions for all the topics.
Confirm with .
6.7 Editing Custom Roles #
Click a custom role's table row and then select in the top left of the table heading to edit a description and permissions of the custom role. Confirm with .
6.8 Deleting Custom Roles #
Click a role's table row and then select to delete the role. Activate the check box and confirm with .