10 Managing NFS Ganesha #
Tip: More Information on NFS Ganesha
For more general information about NFS Ganesha, refer to Chapter 30, NFS Ganesha: Export Ceph Data via NFS.
To list all available NFS exports, click from the main menu.
The list shows each export's directory, daemon host name, type of storage back-end, and access type.
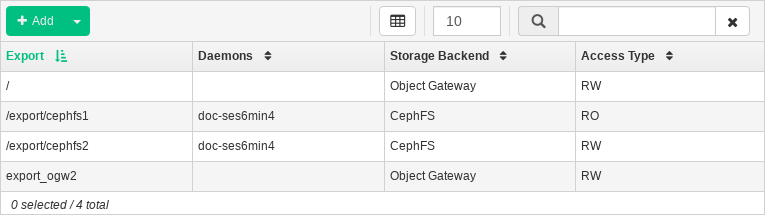
Figure 10.1: List of NFS Exports #
To view more detailed information about an NFS export, click its table row in the table.
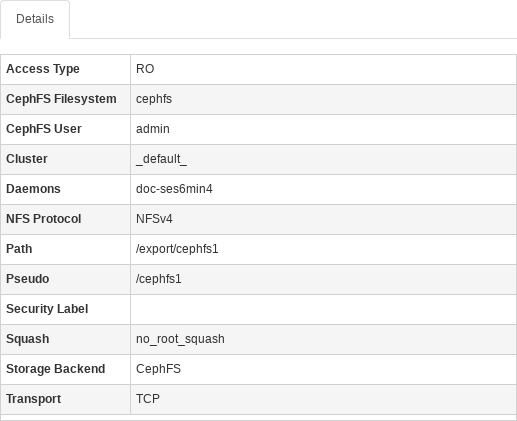
Figure 10.2: NFS Export Details #
10.1 Adding NFS Exports #
To add a new NFS export, click in the top left of the exports table and enter the required information.
Note
The following example uses admin for the Object Gateway User. For
more information on the permissions for other users, see
Section 19.2.1.2, “Authorization and Capabilities”.
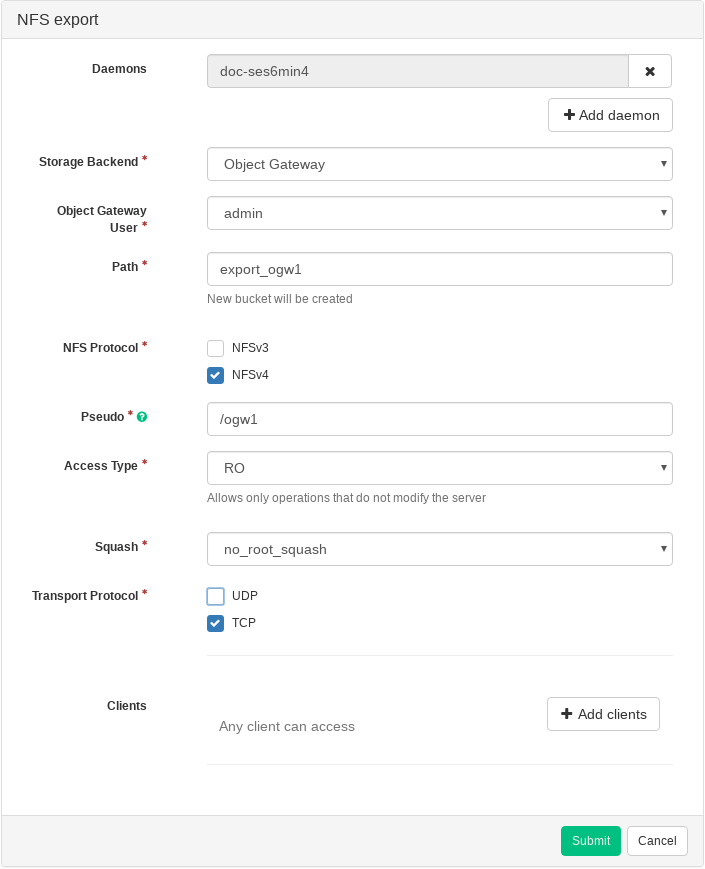
Figure 10.3: Adding a New NFS Export #
Select one or more NFS Ganesha daemons that will run the export.
Select a storage back-end—either or .
Select a user ID and other back-end related options.
Enter the directory path for the NFS export. If the directory does not exist on the server, it will be created.
Specify other NFS related options, such as supported NFS protocol version, pseudo, access type, squashing, or transport protocol.
If you need to limit access to specific clients only, click and add their IP addresses together with access type and squashing options.
Confirm with .
10.2 Deleting NFS Exports #
To delete an export, click its table row and select in the top left of the exports table.
10.3 Editing NFS Exports #
To edit an existing export, click its table row and click in the top left of the exports table.
You can then adjust all the details of the NFS export.
