16 Enhancing virtual machine security with AMD SEV-SNP #
You can enhance the security of your virtual machines with AMD Secure Encrypted Virtualization-Secure Nested Paging (SEV-SNP). The AMD SEV-SNP feature isolates virtual machines from the host system and other VMs, protecting the data and code. This feature encrypts data and ensures that all changes with the code and data in the VM are detected or tracked. Since this isolates VMs, the other VMs or the host machine are not affected by threats.
This section explains the steps to enable and use AMD SEV-SNP on your AMD EPYC server with SUSE Linux Enterprise Server 15 SP7.
16.1 Supported hardware #
A system with an AMD EPYC (3rd Gen or newer) is required to run AMD SEV-SNP virtual machines. The BIOS of the AMD machine must provide the necessary options to enable support for confidential computing on the platform.
16.2 Setting up the base system #
The VM Host Server requires minor configuration changes prior to running AMD SEV-SNP enabled VM Guests.
The default IOMMU configuration in SUSE Linux Enterprise Server 15 SP7 is passthrough mode.
To use the AMD SEV-SNP feature, the IOMMU must be configured in non-passthrough mode.
This is required to prevent peripheral devices from accessing memory that belongs to an encrypted VM Guest,
compromising its data integrity. The MSR kernel module is required to use the optional snphost tool.
To automatically load the
msrmodule at boot:>sudoecho "msr" > /etc/modules-load.d/msr.confTo disable the IOMMU configuration in SUSE Linux Enterprise Server 15 SP7, open the
/etc/default/grubfile and addiommu=noptto theGRUB_CMDLINE_LINUX_DEFAULTvariable.To update the bootloader configuration, run the command:
>sudo;update-bootloaderThe system is now ready to be restarted with the confidential computing kernel. It is not selected as the default kernel in the bootloader, so be sure to select it in the boot menu.
16.3 Verifying setup #
You can verify the installation and configuration of the VM Host Server using dmesg or
the optional snphost tool.
To check the initialization result of the AMD Secure Processor in the kernel log when the kernel is running, run the command:
>sudodmesg | grep -i ccp[ 10.103166] ccp 0000:42:00.1: enabling device (0000 -> 0002) [ 10.114951] ccp 0000:42:00.1: no command queues available [ 10.127137] ccp 0000:42:00.1: sev enabled [ 10.133152] ccp 0000:42:00.1: psp enabled [ 10.240817] ccp 0000:42:00.1: SEV firmware update successful [ 11.128307] ccp 0000:42:00.1: SEV API:1.55 build:8 [ 11.135057] ccp 0000:42:00.1: SEV-SNP API:1.55 build:8The message about the SEV-SNP API version indicates the successful initialization of the AMD Secure Processor. Sometimes it happens that these messages do not appear in the kernel log. In this case, the BIOS settings or the IOMMU configuration are often the root cause.
16.4 Launching an AMD SEV-SNP virtual machine #
You can run AMD SEV-SNP protected virtual machines using the libvirt framework once the
confidential computing kernel is booted and the AMD Secure Processor is initialized.
libvirt has several ways of setting up new virtual machines. This document uses a prepared
disk image and the virt-manager graphical user interface.
Connect virt-manager to the AMD EPYC host and create a new virtual machine.
In the Create a new virtual machine window, select the details:
Select how you want to install the operating system.
Select the ISO or CD-ROM install media.
Select the memory and CPU settings.
Select the required storage details.
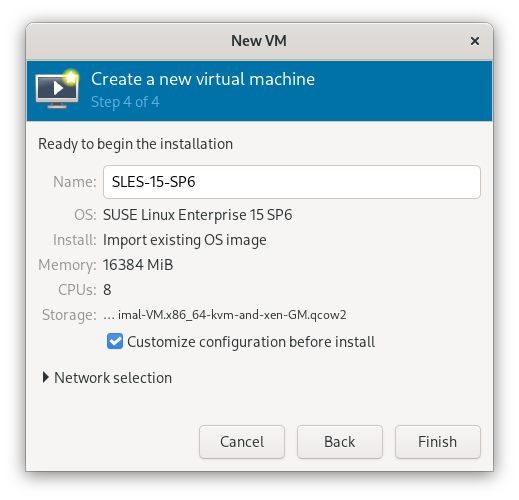
In the fifth step, verify the details and select Customize configuration before install.
Figure 16.1: Create Virtual Machine #Click Finish.
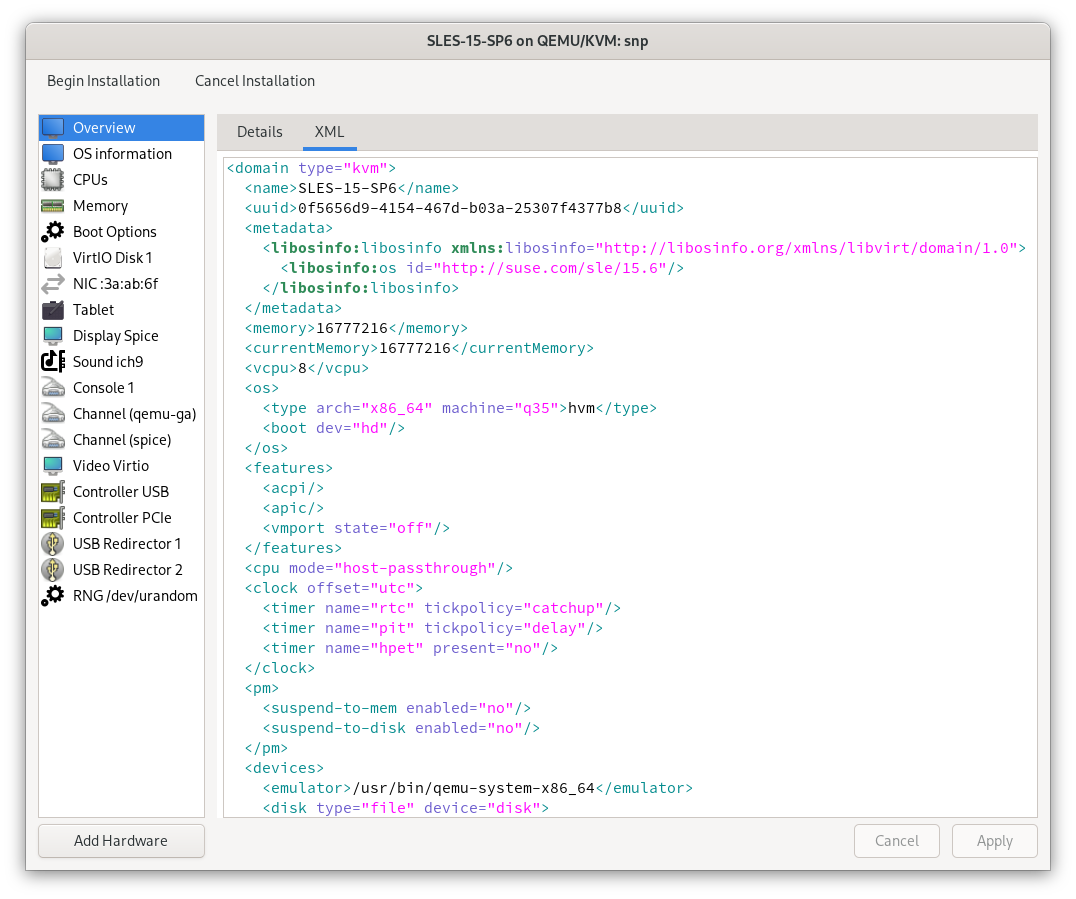
Select the XML tab in the virtual machine configuration window.
In the XML tab, you can edit the XML configuration of the virtual machine used by the
libvirtback-end.Figure 16.2: view of virtual machine configuration #To protect the virtual machine with AMD SEV-SNP, set the correct firmware by modifying the
ossection as shown below:Figure 16.3: Set firmware #The
loaderline sets the firmware to the SEV version of OVMF.Add a
launchSecuritysection. For AMD SEV-SNP, the section looks like this:Figure 16.4: launchSecurity #Click Apply and then click the Details tab.
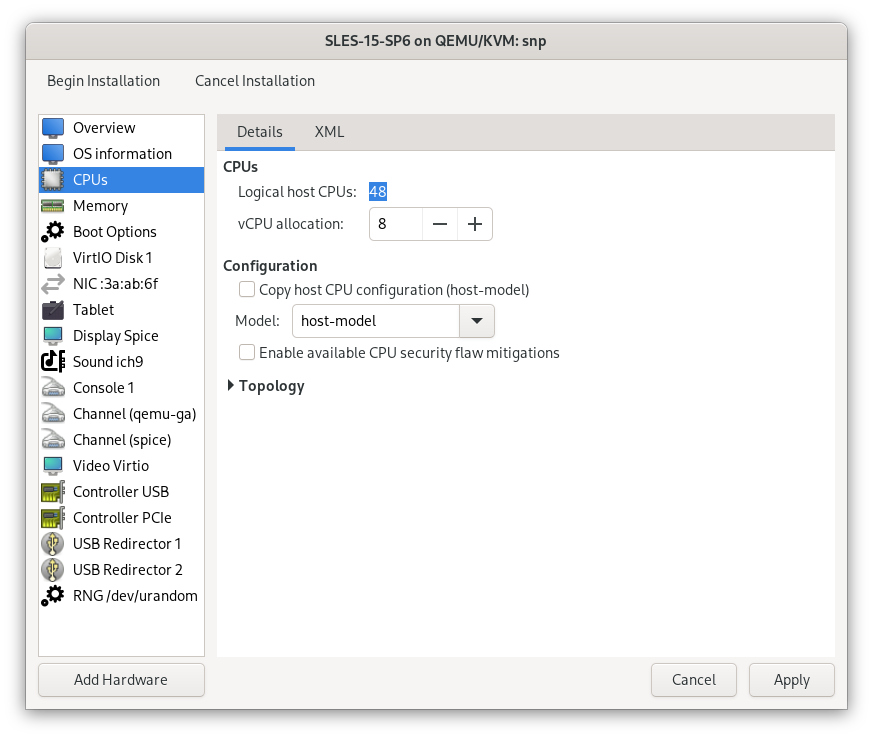
Select CPUs in the left-hand list and set the CPU Model to
host-model:Figure 16.5: The view of virtual machine configuration #Click Apply and then click Begin Installation.
This starts the virtual machine and installs it according to your settings. The virtual machine boots up once the process is complete, and you can verify the AMD SEV-SNP protection.
16.5 Verifying the AMD SEV-SNP virtual machine #
From the appearance of the virtual machine, one cannot tell whether it runs in a confidential computing environment. But there are several ways to verify that from within the virtual machine.
The kernel log will contain messages describing the state of AMD memory encryption features within the virtual machine. To check the kernel log, run the following command:
>sudodmesg | grep -i sev-snp[ 1.986186] Memory Encryption Features active: AMD SEV SEV-ES SEV-SNP
The presence of the SEV-SNP feature in the kernel log, among other active memory encryption features, shows that it is active for the virtual machine.
You can use the optional snpguest tool to verify if the SEV-SNP
feature is active in the virtual machine. Similar to snphost, the
snpguest tool requires the MSR kernel module. The following example
demonstrates using snpguest to check the status of memory encryption
features within the virtual machine:
>sudomodprobe msr && snpguest ok[ PASS ] - SEV: ENABLED [ PASS ] - SEV-ES: ENABLED [ PASS ] - SNP: ENABLED
There are also cryptographically secure ways to prove the security of the AMD SEV-SNP environment.
16.6 Attesting the AMD SEV-SNP Virtual Machine #
Once SEV-SNP activation has been verified, the integrity of the confidential VM can be established through attestation, which provides cryptographic proof that it runs on genuine AMD hardware under a verified firmware and TCB level, backed by a trusted certificate hierarchy.
Note that the steps here perform local attestation verification only. It verifies the report signature and certificate chain from inside the guest and ensures that the attestation data matches the platform state. This workflow does not include remote attestation, where the attestation report is sent to an external verifier or service that independently validates the platform trust and enforces access to secrets or workload authorization.
The attestation process involves two tools: snpguest and snphost.
16.6.1 Generating and verifying the attestation report #
Inside the guest, the snpguest tool can be used to perform the
attestation workflow. This process generates an attestation report, fetches the
corresponding AMD certificate chain, and verifies that the report is cryptographically
signed by a valid platform key.
Generate an attestation report and a corresponding request file. The
--randomflag includes random data for uniqueness:>sudosnpguest report attestation-report.bin request-file.bin --randomFetch the AMD CA and ASK certificates from the Key Distribution Service (KDS) in DER format. Replace
genoawith your processor model if different:>sudosnpguest fetch ca der genoa ./certs-kdsFetch the Versioned Chip Endorsement Key (VCEK) using the generated attestation report:
>sudosnpguest fetch vcek der genoa ./certs-kds attestation-report.binVerify the attestation report against the fetched certificates:
>sudosnpguest verify attestation ./certs-kds attestation-report.binReported TCB Boot Loader from certificate matches the attestation report. Reported TCB TEE from certificate matches the attestation report. Reported TCB SNP from certificate matches the attestation report. Reported TCB Microcode from certificate matches the attestation report. Chip ID from certificate matches the attestation report. VEK signed the Attestation Report!
The extended attestation workflow using the
snpguest certificates command relies on QEMU functionality that is
not currently available.
16.6.2 Validating AMD certificates on the host #
The host can optionally fetch and verify the AMD certificate chain used to validate guest attestation reports.
Fetch the AMD CA and ASK certificates from AMD’s Key Distribution Service (KDS):
>sudosnphost fetch ca pem ./certsFetch the chip endorsement certificate (VCEK or VLEK) for the platform:
>sudosnphost fetch vek pem ./certsVerify the integrity of the fetched certificate chain:
>sudosnphost verify ./certs• = self signed, ⬑ = signs, •̷ = invalid self sign, ⬑̸ = invalid signs ARK • ARK ⬑ ASK ASK ⬑ VCEK


