Deployment, Administration, and User Guides
- About This Guide
- I Overview of SUSE Cloud Application Platform
- II Deploying SUSE Cloud Application Platform
- 3 Deployment and Administration Notes
- 4 Deploying SUSE Cloud Application Platform on SUSE CaaS Platform
- 5 Deploying SUSE Cloud Application Platform on Microsoft Azure Kubernetes Service (AKS)
- 6 Deploying SUSE Cloud Application Platform on Amazon Elastic Kubernetes Service (EKS)
- 7 Deploying SUSE Cloud Application Platform on Google Kubernetes Engine (GKE)
- 8 Installing the Stratos Web Console
- 9 Eirini
- 10 Deploying SUSE Cloud Application Platform Using Terraform
- 11 Setting Up a Registry for an Air Gapped Environment
- 12 SUSE Private Registry
- III SUSE Cloud Application Platform Administration
- 13 Upgrading SUSE Cloud Application Platform
- 14 Configuration Changes
- 15 Creating Admin Users
- 16 Managing Passwords
- 17 Accessing the UAA User Interface
- 18 Container Memory Limits and Requests
- 19 Cloud Controller Database Secret Rotation
- 20 Rotating Automatically Generated Secrets
- 21 Backup and Restore
- 22 Service Brokers
- 23 App-AutoScaler
- 24 Integrating CredHub with SUSE Cloud Application Platform
- 25 Buildpacks
- IV SUSE Cloud Application Platform User Guide
- V Troubleshooting
- A Appendix
- B GNU Licenses
8 Installing the Stratos Web Console #
- File Name: cap_depl_stratos.xml
- ID:
The Stratos user interface (UI) is a modern web-based management application for Cloud Foundry. It provides a graphical management console for both developers and system administrators.
8.1 Deploy Stratos on SUSE® CaaS Platform #
- File Name: cap_depl_stratos.xml
- ID: sec-cap-stratos-prod
The steps in this section describe how to install Stratos on SUSE® CaaS Platform
without an external load balancer, instead mapping a worker node to your
SUSE Cloud Application Platform domain as described in
Section 4.5, “Deployment Configuration”. These instructions assume you
have followed the procedure in Chapter 4, Deploying SUSE Cloud Application Platform on SUSE CaaS Platform,
have deployed kubecf successfully, and have created a
default storage class.
If you are using SUSE Enterprise Storage as your storage back-end, copy the secret into the Stratos namespace:
tux > kubectl get secret ceph-secret-admin --output json --namespace default | \
sed 's/"namespace": "default"/"namespace": "stratos"/' | kubectl create --filename -
You should already have the Stratos charts when you downloaded the SUSE
charts repository (see Section 4.12, “Add the Kubernetes Charts Repository”). Search your
Helm repository to verify that you have the suse/console
chart:
tux > helm search repo suse
NAME                            CHART VERSION        APP VERSION    DESCRIPTION
suse/cf-operator                7.2.1+0.gaeb6ef3    2.1.1          A Helm chart for cf-operator, the k8s operator ....
suse/console                    4.4.1                2.1.1          A Helm chart for deploying SUSE Stratos Console
suse/kubecf                     2.7.13                2.1.1          A Helm chart for KubeCF
suse/metrics                    1.3.0                2.1.1          A Helm chart for Stratos Metrics
suse/minibroker                 1.2.0                               A minibroker for your minikube
suse/nginx-ingress              0.28.4               0.15.0         An nginx Ingress controller that uses ConfigMap to store ...
...
Create a YAML file, called stratos-config-values.yaml in this
example, and use it to make configurations to the Stratos Helm chart.
### example Stratos deployment configuration file
### stratos-config-values.yaml

console:
  # Use local admin user instead of UAA
  localAdminPassword: changeme
Note: Technology Preview Features
Some Stratos releases may include features as part of a technology preview. Technology preview features are for evaluation purposes only and not supported for production use. To see the technology preview features available for a given release, refer to https://github.com/SUSE/stratos/blob/master/CHANGELOG.md.
To enable technology preview features, add the
console.techPreview Helm value to your
stratos-config-values.yaml and set it to
true.
### example Stratos deployment configuration file
### stratos-config-values.yaml

console:
  techPreview: true
Create a namespace for your Stratos deployment.
tux > kubectl create namespace stratosDeploy Stratos using Helm.
tux > helm install susecf-console suse/console \
--namespace stratos \
--values stratos-config-values.yaml
You can monitor the status of your stratos deployment with
the watch command:
tux > watch --color 'kubectl get pods --namespace stratos'
When stratos is successfully deployed, the following is
observed:
For the
volume-migrationpod, theSTATUSisCompletedand theREADYcolumn is at0/1.All other pods have a
RunningSTATUSand aREADYvalue ofn/n.
Press Ctrl–C to
exit the watch command.
When the stratos deployment completes, query with Helm
to view your release information:
tux > helm status susecf-console
LAST DEPLOYED: Wed Mar 27 06:51:36 2019
NAMESPACE: stratos
STATUS: DEPLOYED

RESOURCES:
==> v1/Secret
NAME                           TYPE    DATA  AGE
susecf-console-secret          Opaque  2     3h
susecf-console-mariadb-secret  Opaque  2     3h

==> v1/PersistentVolumeClaim
NAME                                  STATUS  VOLUME                                    CAPACITY  ACCESSMODES  STORAGECLASS  AGE
susecf-console-upgrade-volume         Bound   pvc-711380d4-5097-11e9-89eb-fa163e15acf0  20Mi      RWO          persistent    3h
susecf-console-encryption-key-volume  Bound   pvc-711b5275-5097-11e9-89eb-fa163e15acf0  20Mi      RWO          persistent    3h
console-mariadb                       Bound   pvc-7122200c-5097-11e9-89eb-fa163e15acf0  1Gi       RWO          persistent    3h

==> v1/Service
NAME                    CLUSTER-IP      EXTERNAL-IP                                                PORT(S)   AGE
susecf-console-mariadb  172.24.137.195  <none>                                                     3306/TCP  3h
susecf-console-ui-ext   172.24.80.22    10.86.101.115,172.28.0.31,172.28.0.36,172.28.0.7,172.28.0.22  8443/TCP  3h

==> v1beta1/Deployment
NAME        DESIRED  CURRENT  UP-TO-DATE  AVAILABLE  AGE
stratos-db  1        1        1           1          3h

==> v1beta1/StatefulSet
NAME     DESIRED  CURRENT  AGE
stratos  1        1        3h
Find the external IP address with
kubectl get service susecf-console-ui-ext --namespace stratos to access your new Stratos Web console, for example https://10.86.101.115:8443, or use the
domain you created for it, and its port, for example
https://example.com:8443. Proceed past the warnings about the self-signed
certificates and log in as admin with the password you
created in stratos-config-values.yaml
Figure 8.1: Stratos UI Cloud Foundry Console #
8.1.1 Connecting SUSE® CaaS Platform to Stratos #
- File Name: cap_depl_stratos.xml
- ID: sec-cap-stratos-caasp-connect
Stratos can show information from your SUSE® CaaS Platform environment.
To enable this, you must register and connect your SUSE® CaaS Platform environment with Stratos.
In the Stratos UI, go to in the left-hand side navigation and click on the icon in the top-right of the view - you should be shown the "Register new Endpoint" view.
In the Stratos UI, go to in the left-hand side navigation and click on the icon in the top-right of the view.
On the
Register a new Endpointview, click theSUSE CaaS Platformbutton.Enter a memorable name for your SUSE® CaaS Platform environment in the field. For example, my-endpoint.
Enter the URL of the API server for your Kubernetes environment in the field. Run
kubectl cluster-infoand use the value ofKubernetes masteras the URL.tux >kubectl cluster-infoActivate the check box if using self-signed certificates.
Click .
Activate the check box.
Provide a valid
kubeconfigfile for your SUSE® CaaS Platform environment.Click .
In the Stratos UI, go to in the left-hand side navigation. Information for your SUSE® CaaS Platform environment should now be displayed as in the following figure.

Figure 8.2: Kubernetes Environment Information on Stratos #
8.2 Deploy Stratos on Amazon EKS #
- File Name: cap_depl_stratos.xml
- ID: sec-cap-stratos-eks
Before deploying Stratos, ensure kubecf has been successfully
deployed on Amazon EKS (see Chapter 6, Deploying SUSE Cloud Application Platform on Amazon Elastic Kubernetes Service (EKS)).
Configure a scoped storage class for your Stratos deployment. Create a configuration
file, called scoped-storage-class.yaml in this example,
using the following as a template. Specify the region you are using as the
zone and be sure to include the letter (for example, the
letter a in us-west-2a) identifier to indicate
the Availability Zone used:
kind: StorageClass
apiVersion: storage.k8s.io/v1
metadata:
  name: gp2scoped
provisioner: kubernetes.io/aws-ebs
parameters:
  type: gp2
  zone: "us-west-2a"
reclaimPolicy: Retain
mountOptions:
  - debug
Create the storage class using the scoped-storage-class.yaml
configuration file:
tux > kubectl create --filename scoped-storage-class.yamlVerify the storage class has been created:
tux > kubectl get storageclass
NAME            PROVISIONER             AGE
gp2 (default)   kubernetes.io/aws-ebs   1d
gp2scoped       kubernetes.io/aws-ebs   1d
Create a YAML file, called stratos-config-values.yaml in this
example, and use it to make configurations to the Stratos Helm chart.
### example Stratos deployment configuration file
### stratos-config-values.yaml

console:
  # Use local admin user instead of UAA
  localAdminPassword: changeme

services:
  loadbalanced: true

kube:
  storage_class:
    persistent: gp2scoped
Note: Technology Preview Features
Some Stratos releases may include features as part of a technology preview. Technology preview features are for evaluation purposes only and not supported for production use. To see the technology preview features available for a given release, refer to https://github.com/SUSE/stratos/blob/master/CHANGELOG.md.
To enable technology preview features, add the
console.techPreview Helm value to your
stratos-config-values.yaml and set it to
true.
### example Stratos deployment configuration file
### stratos-config-values.yaml

console:
  techPreview: true
Create a namespace for your Stratos deployment.
tux > kubectl create namespace stratosDeploy Stratos using Helm.
tux > helm install susecf-console suse/console
\
--namespace stratos \
--values stratos-config-values.yaml
You can monitor the status of your stratos deployment with
the watch command:
tux > watch --color 'kubectl get pods --namespace stratos'
When stratos is successfully deployed, the following is
observed:
For the
volume-migrationpod, theSTATUSisCompletedand theREADYcolumn is at0/1.All other pods have a
RunningSTATUSand aREADYvalue ofn/n.
Press Ctrl–C to
exit the watch command.
Obtain the host name of the service exposed through the public load balancer:
tux > kubectl get service susecf-console-ui-ext --namespace stratos
Use this host name to create a CNAME record. After the record is created,
access the console in a web browser by navigating to the domain mapped to the
host name of the service retrieved from the
kubectl get service step. Upon successfully logging in,
you should see something similar to the following figure.
Figure 8.3: Stratos UI Cloud Foundry Console #
8.2.1 Connecting Amazon EKS to Stratos #
- File Name: cap_depl_stratos.xml
- ID: sec-cap-stratos-eks-connect
Stratos can show information from your Amazon EKS environment.
To enable this, you must register and connect your Amazon EKS environment with Stratos.
In the Stratos UI, go to in the left-hand side navigation and click on the icon in the top-right of the view - you should be shown the "Register new Endpoint" view.
In the Stratos UI, go to in the left-hand side navigation and click on the icon in the top-right of the view.
On the
Register a new Endpointview, click theAmazon EKSbutton.Enter a memorable name for your Amazon EKS environment in the field. For example, my-endpoint.
Enter the URL of the API server for your Kubernetes environment in the field. Run
kubectl cluster-infoand use the value ofKubernetes masteras the URL.tux >kubectl cluster-infoActivate the check box if using self-signed certificates.
Click .
Activate the check box.
Enter the name of your Amazon EKS cluster in the field.
Enter your AWS Access Key ID in the field.
Enter your AWS Secret Access Key in the field.
Click .
In the Stratos UI, go to in the left-hand side navigation. Information for your Amazon EKS environment should now be displayed as in the following figure.
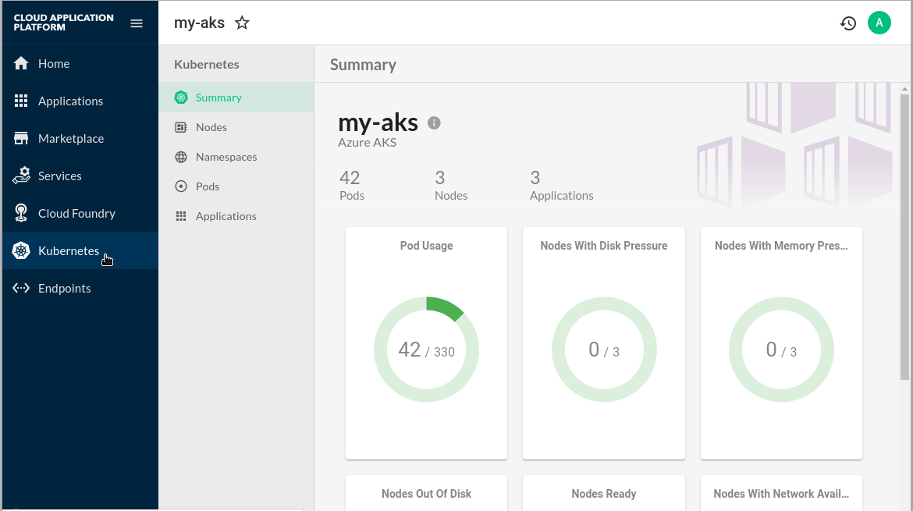
Figure 8.4: Kubernetes Environment Information on Stratos #
8.3 Deploy Stratos on Microsoft AKS #
- File Name: cap_depl_stratos.xml
- ID: sec-cap-stratos-aks
Before deploying Stratos, ensure kubecf has been successfully
deployed on Microsoft AKS (see Chapter 5, Deploying SUSE Cloud Application Platform on Microsoft Azure Kubernetes Service (AKS)).
Create a YAML file, called stratos-config-values.yaml in this
example, and use it to make configurations to the Stratos Helm chart.
### example Stratos deployment configuration file
### stratos-config-values.yaml

console:
  # Use local admin user instead of UAA
  localAdminPassword: changeme

services:
  loadbalanced: true
Note: Technology Preview Features
Some Stratos releases may include features as part of a technology preview. Technology preview features are for evaluation purposes only and not supported for production use. To see the technology preview features available for a given release, refer to https://github.com/SUSE/stratos/blob/master/CHANGELOG.md.
To enable technology preview features, add the
console.techPreview Helm value to your
stratos-config-values.yaml and set it to
true.
### example Stratos deployment configuration file
### stratos-config-values.yaml

console:
  techPreview: true
Create a namespace for your Stratos deployment.
tux > kubectl create namespace stratosDeploy Stratos using Helm.
tux > helm install susecf-console suse/console
\
--namespace stratos \
--values stratos-config-values.yaml
You can monitor the status of your stratos deployment with
the watch command:
tux > watch --color 'kubectl get pods --namespace stratos'
When stratos is successfully deployed, the following is
observed:
For the
volume-migrationpod, theSTATUSisCompletedand theREADYcolumn is at0/1.All other pods have a
RunningSTATUSand aREADYvalue ofn/n.
Press Ctrl–C to
exit the watch command.
Obtain the IP address of the service exposed through the public load balancer:
tux > kubectl get service susecf-console-ui-ext --namespace stratos
Use this IP address to create an A record. After the record is created,
access the console in a web browser by navigating to the domain mapped to the
IP address of the service retrieved from the
kubectl get service step. Upon successfully logging in,
you should see something similar to the following figure.
Figure 8.5: Stratos UI Cloud Foundry Console #
8.3.1 Connecting Microsoft AKS to Stratos #
- File Name: cap_depl_stratos.xml
- ID: sec-cap-stratos-aks-connect
Stratos can show information from your Microsoft AKS environment.
To enable this, you must register and connect your Microsoft AKS environment with Stratos.
In the Stratos UI, go to in the left-hand side navigation and click on the icon in the top-right of the view - you should be shown the "Register new Endpoint" view.
In the Stratos UI, go to in the left-hand side navigation and click on the icon in the top-right of the view.
On the
Register a new Endpointview, click theAzure AKSbutton.Enter a memorable name for your Microsoft AKS environment in the field. For example, my-endpoint.
Enter the URL of the API server for your Kubernetes environment in the field. Run
kubectl cluster-infoand use the value ofKubernetes masteras the URL.tux >kubectl cluster-infoActivate the check box if using self-signed certificates.
Click .
Activate the check box.
Provide a valid
kubeconfigfile for your Microsoft AKS environment.Click .
In the Stratos UI, go to in the left-hand side navigation. Information for your Microsoft AKS environment should now be displayed as in the following figure.
Figure 8.6: Kubernetes Environment Information on Stratos #
8.4 Deploy Stratos on Google GKE #
- File Name: cap_depl_stratos.xml
- ID: sec-cap-stratos-gke
Before deploying Stratos, ensure kubecf has been successfully
deployed on Google GKE (see Chapter 7, Deploying SUSE Cloud Application Platform on Google Kubernetes Engine (GKE)).
Create a YAML file, called stratos-config-values.yaml in this
example, and use it to make configurations to the Stratos Helm chart.
### example Stratos deployment configuration file
### stratos-config-values.yaml

console:
  # Use local admin user instead of UAA
  localAdminPassword: changeme

services:
  loadbalanced: true
Note: Technology Preview Features
Some Stratos releases may include features as part of a technology preview. Technology preview features are for evaluation purposes only and not supported for production use. To see the technology preview features available for a given release, refer to https://github.com/SUSE/stratos/blob/master/CHANGELOG.md.
To enable technology preview features, add the
console.techPreview Helm value to your
stratos-config-values.yaml and set it to
true.
### example Stratos deployment configuration file
### stratos-config-values.yaml

console:
  techPreview: true
Create a namespace for your Stratos deployment.
tux > kubectl create namespace stratosDeploy Stratos using Helm.
tux > helm install susecf-console suse/console
\
--namespace stratos \
--values stratos-config-values.yaml
You can monitor the status of your stratos deployment with
the watch command:
tux > watch --color 'kubectl get pods --namespace stratos'
When stratos is successfully deployed, the following is
observed:
For the
volume-migrationpod, theSTATUSisCompletedand theREADYcolumn is at0/1.All other pods have a
RunningSTATUSand aREADYvalue ofn/n.
Press Ctrl–C to
exit the watch command.
Obtain the IP address of the service exposed through the public load balancer:
tux > kubectl get service susecf-console-ui-ext --namespace stratos
Use this IP address to create an A record. After the record is created,
access the console in a web browser by navigating to the domain mapped to the
IP address of the service retrieved from the
kubectl get service step. Upon successfully logging in,
you should see something similar to the following figure.
Figure 8.7: Stratos UI Cloud Foundry Console #
8.4.1 Connecting Google GKE to Stratos #
- File Name: cap_depl_stratos.xml
- ID: sec-cap-stratos-gke-connect
Stratos can show information from your Google GKE environment.
To enable this, you must register and connect your Google GKE environment with Stratos.
In the Stratos UI, go to in the left-hand side navigation and click on the icon in the top-right of the view - you should be shown the "Register new Endpoint" view.
In the Stratos UI, go to in the left-hand side navigation and click on the icon in the top-right of the view.
On the
Register a new Endpointview, click theGoogle Kubernetes Enginebutton.Enter a memorable name for your Microsoft AKS environment in the field. For example, my-endpoint.
Enter the URL of the API server for your Kubernetes environment in the field. Run
kubectl cluster-infoand use the value ofKubernetes masteras the URL.tux >kubectl cluster-infoActivate the check box if using self-signed certificates.
Click .
Activate the check box.
Provide a valid
Application Default Credentialsfile for your Google GKE environment. Generate the file using the command below. The command saves the credentials to a file namedapplication_default_credentials.jsonand outputs the path of the file.tux >gcloud auth application-default loginClick .
In the Stratos UI, go to in the left-hand side navigation. Information for your Google GKE environment should now be displayed as in the following figure.
Figure 8.8: Kubernetes Environment Information on Stratos #
8.5 Upgrading Stratos #
- File Name: cap_depl_stratos.xml
- ID: sec-cap-stratos-upgrade
For instructions to upgrade Stratos, follow the process described in
Chapter 13, Upgrading SUSE Cloud Application Platform. Take note that kubecf is
upgraded prior to upgrading Stratos.
8.6 Stratos Metrics #
- File Name: cap_depl_stratos.xml
- ID: sec-cap-stratos-metrics
Stratos Metrics provides a Helm chart for deploying Prometheus (see https://prometheus.io/) and the following metrics exporters to Kubernetes:
Cloud Foundry Firehose Exporter (enabled by default)
Cloud Foundry Exporter (disabled by default)
Kubernetes State Metrics Exporter (disabled by default)
The Stratos Metrics Helm chart deploys a Prometheus server and the configured Exporters and fronts the Prometheus server with an nginx server to provide authenticated access to Prometheus (currently basic authentication over HTTPS).
When required by configuration, it also contains an initialization script that will setup users in the UAA that have correct scopes/permissions to be able to read data from the Cloud Foundry Firehose and/or API.
Lastly, the Helm chart generates a small metadata file in the root of the nginx server that is used by Stratos to determine which Cloud Foundry and Kubernetes clusters the Prometheus server is providing Metrics for.
To learn more about Stratos Metrics and its full list of configuration options, see https://github.com/SUSE/stratos-metrics.
8.6.1 Exporter Configuration #
- File Name: cap_depl_stratos.xml
- ID: sec-cap-stratos-metrics-exporter-config
8.6.1.1 Firehose Exporter #
- File Name: cap_depl_stratos.xml
- ID: sec-cap-stratos-metrics-exporter-config-firehose
This exporter can be enabled/disabled via the Helm value
firehoseExporter.enabled. By default this exporter is
enabled.
You must provide the following Helm chart values for this Exporter to work correctly:
cloudFoundry.apiEndpoint- API Endpoint of the Cloud Foundry API ServercloudFoundry.uaaAdminClient- Admin client of the UAA used by the Cloud Foundry servercloudFoundry.uaaAdminClientSecret- Admin client secret of the UAA used by the Cloud Foundry servercloudFoundry.skipSslVerification- Whether to skip SSL verification when communicating with Cloud Foundry and the UAA APIs
You can scale the firehose nozzle in Stratos Metrics by specifying the following override:
firehoseExporter:
  instances: 1
Please note, the number of firehose nozzles should be proportional to the number of Traffic Controllers in your Cloud Foundry (see docs at https://docs.cloudfoundry.org/loggregator/log-ops-guide.html). Otherwise, Loggregator will not split the firehose between the nozzles.
8.6.1.2 Cloud Foundry Exporter #
- File Name: cap_depl_stratos.xml
- ID: sec-cap-stratos-metrics-exporter-config-cloud-foundry
This exporter can be enabled/disabled via the Helm value
cfExporter.enabled. By default this exporter is
disabled.
You must provide the following Helm chart values for this Exporter to work correctly:
cloudFoundry.apiEndpoint- API Endpoint of the Cloud Foundry API ServercloudFoundry.uaaAdminClient- Admin client of the UAA used by the Cloud Foundry servercloudFoundry.uaaAdminClientSecret- Admin client secret of the UAA used by the Cloud Foundry servercloudFoundry.skipSslVerification- Whether to skip SSL verification when communicating with Cloud Foundry and the UAA APIs
8.6.1.3 Kubernetes Monitoring #
- File Name: cap_depl_stratos.xml
- ID: sec-cap-stratos-metrics-exporter-config-kubernetes
This exporter can be enabled/disabled via the Helm value
prometheus.kubeStateMetrics.enabled. By default this
exporter is disabled.
You must provide the following Helm chart values for this Exporter to work correctly:
kubernetes.apiEndpoint- The API Endpoint of the Kubernetes API Server
8.6.2 Install Stratos Metrics with Helm #
- File Name: cap_depl_stratos.xml
- ID: sec-cap-stratos-metrics-install
In order to display metrics data with Stratos, you need to deploy the
stratos-metrics Helm chart. As with othe examples in
this guide, a YAML file is defined to change configurations of the Helm
chart.
Create a new YAML file. In this example, it is named
stratos-metrics-values.yaml and it contains
configuration options specific to Stratos Metrics.
The following is an example stratos-metrics-values.yaml
file.
cloudFoundry:
  apiEndpoint: https://api.example.com
  uaaAdminClient: admin
  uaaAdminClientSecret: password
  skipSslVerification: "true"
env:
  DOPPLER_PORT: 443
kubernetes:
  apiEndpoint: kube_server_address.example.com
metrics:
  username: username
  password: password
prometheus:
  kubeStateMetrics:
    enabled: true
  server:
    storageClass: "persistent"
services:
  loadbalanced: true
where:
kubernetes.apiEndpointis the same URL that you used when registering your Kubernetes environment with Stratos (the Kubernetes API Server URL).prometheus.server.storageClassis the storage class to be used by Stratos Metrics. If a storage class is not assigned, the default storage class will be used. If a storage class is not specified and there is no default storage class, theprometheuspod will fail to start.metrics.usernameis the username used to authenticate with the nginx server that fronts Prometheus. This username is also used during the Section 8.6.3, “Connecting Stratos Metrics”) process.metrics.passwordis the password used to authenticate with the nginx server that fronts Prometheus. This password is also used during the Section 8.6.3, “Connecting Stratos Metrics”) process. Ensure a secure password is chosen.services.loadbalancedis set totrueif your Kubernetes deployment supports automatic configuration of a load balancer (for example, AKS, EKS, and GKE).
If you are using SUSE Enterprise Storage, you must copy the Ceph admin secret to the
metrics namespace:
tux > kubectl get secret ceph-secret-admin --output json --namespace default | \
sed 's/"namespace": "default"/"namespace": "metrics"/' | kubectl create --filename -
Install Metrics with:
tux >kubectl create namespace metricstux >helm install susecf-metrics suse/metrics \ --namespace metrics \ --values kubecf-config-values.yaml \ --values stratos-metrics-values.yaml
Monitor progress:
$ watch --color 'kubectl get pods --namespace metrics'
When all statuses show Ready, press Ctrl–C to exit and to
view your release information.
8.6.3 Connecting Stratos Metrics #
- File Name: cap_depl_stratos.xml
- ID: sec-cap-stratos-metrics-connect
When Stratos Metrics is connected to Stratos, additional views are enabled that show metrics metadata that has been ingested into the Stratos Metrics Prometheus server.
To enable this, you must register and connect your Stratos Metrics instance with Stratos.
In the Stratos UI, go to in the left-hand side navigation and click on the icon in the top-right of the view - you should be shown the "Register new Endpoint" view. Next:
Select Metrics from the dropdown.
Enter a memorable name for your environment in the field.
Enter the . Use the following to find the endpoint value.
tux >kubectl get service susecf-metrics-metrics-nginx --namespace metricsFor Microsoft AKS, Amazon EKS, and Google GKE deployments which use a load balancer, the output will be similar to the following:
NAME                           TYPE           CLUSTER-IP     EXTERNAL-IP      PORT(S)         AGE
susecf-metrics-metrics-nginx   LoadBalancer   10.0.202.180   52.170.253.229   443:30263/TCP   21h
Preprend
https://to the public IP of the load balancer, and enter it into the field. Using the values from the example above,https://52.170.253.229is entered as the endpoint address.For SUSE CaaS Platform deployments which do not use a load balancer, the output will be similar to the following:
NAME                           TYPE       CLUSTER-IP       EXTERNAL-IP               PORT(S)         AGE
susecf-metrics-metrics-nginx   NodePort   172.28.107.209   10.86.101.115,172.28.0.31 443:30685/TCP   21h
Prepend
https://to the external IP of your node, followed by thenodePort, and enter it into the field. Using the values from the example above,https://10.86.101.115:30685is entered as the endpoint address.
Check the checkbox if using self-signed certificates.
Click .
The view will refresh to show the new endpoint in the disconnected state. Next you will need to connect to this endpoint.
In the table of endpoints, click the overflow menu icon alongside the endpoint that you added above, then:
Click on in the dropdown menu.
Enter the username for your Stratos Metrics instance. This will be the
metrics.usernamedefined in yourstratos-metrics-values.yamlfile.Enter the password for your Stratos Metrics instance. This will be the
metrics.passworddefined in yourstratos-metrics-values.yamlfile.Click .
Once connected, you should see that the name of your Metrics endpoint is a hyperlink and clicking on it should show basic metadata about the Stratos Metrics endpoint.
Metrics data and views should now be available in the Stratos UI, for example:
On the tab for an Application, the table should show an additional Cell column to indicate which Diego Cell the instance is running on. This should be clickable to navigate to a Cell view showing Cell information and metrics.
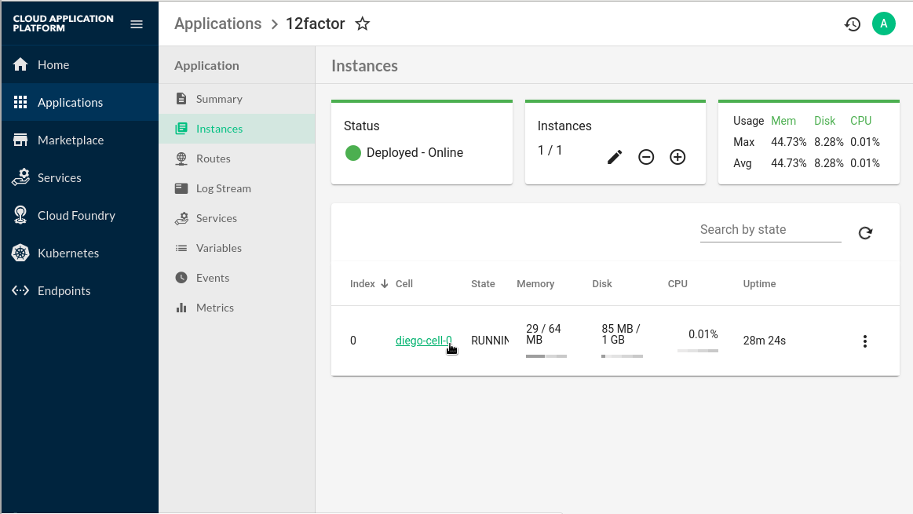
Figure 8.9: Cell Column on Application Instance Tab after Connecting Stratos Metrics #
On the view for an Application there should be a new Metrics tab that shows Application metrics.
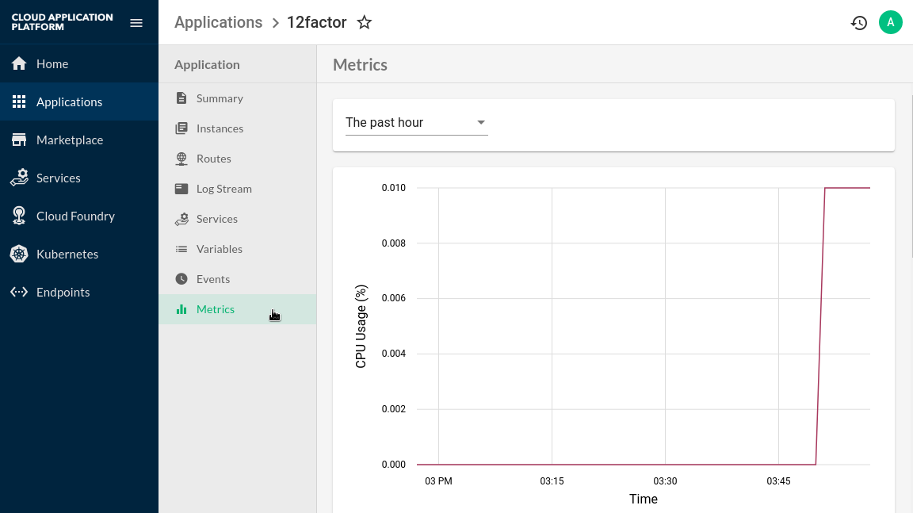
Figure 8.10: Application Metrics Tab after Connecting Stratos Metrics #
On the Kubernetes views, views such as the Node view should show an additional tab with metric information.
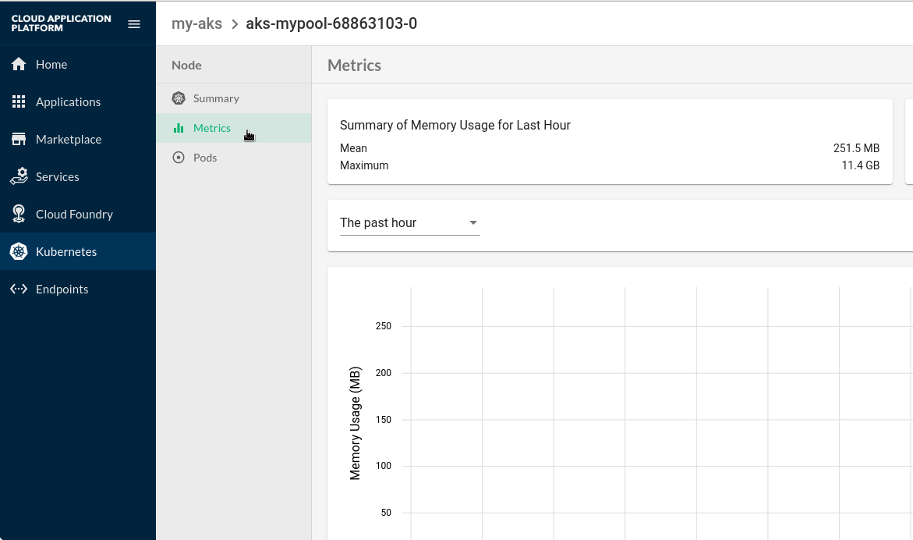
Figure 8.11: Node Metrics on the Stratos Kubernetes View #