Deploying SUSE Linux Enterprise Server Using Network PXE Boot
- WHAT?
SUSE Linux Enterprise Server provides images that can be deployed remotely using the PXE boot of the target device.
- WHY?
You want to deploy SUSE Linux Enterprise Server remotely.
- EFFORT
It takes about 15 minutes to read the article.
- GOAL
A properly installed and running instance of SUSE Linux Enterprise Server.
- REQUIREMENTS
A properly configured PXE boot server. For details, refer to: PXE server installation.
1 Introduction to the PXE installation of SUSE Linux Enterprise Server #
SUSE Linux Enterprise Server can be installed via a Preboot Execution Environment (PXE). The client hardware needs to support booting via PXE. The network needs to provide a DHCP server and a TFTP server providing the required data to the clients.
The deployment procedure can be summarized to the following steps:
Make sure the DHCP server is configured properly.
Prepare the TFTP or HTTP server by adding the installation image and configuring the boot settings. For details refer to preparing installation files.
On the target machine, select PXE boot and boot the machine. For details, refer to Section 2.1, “Booting the machine”.
2 Deploying SLES remotely #
The deployment process consists of two phases. The first phase involves booting the machine and loading the kernel and initrd. The second phase is the installation itself using Agama. Details are provided in the following sections.
2.1 Booting the machine #
The following procedure describes how to boot the client machine to start the remote deployment of SLES using the PXE client.
Power on the target machine or create a virtual machine. Make sure to use bridged networking.
Enter the UEFI or legacy BIOS boot menu and select booting using PXE or HTTP. Continue to boot the machine.
The machine should start the deployment. Kernel and
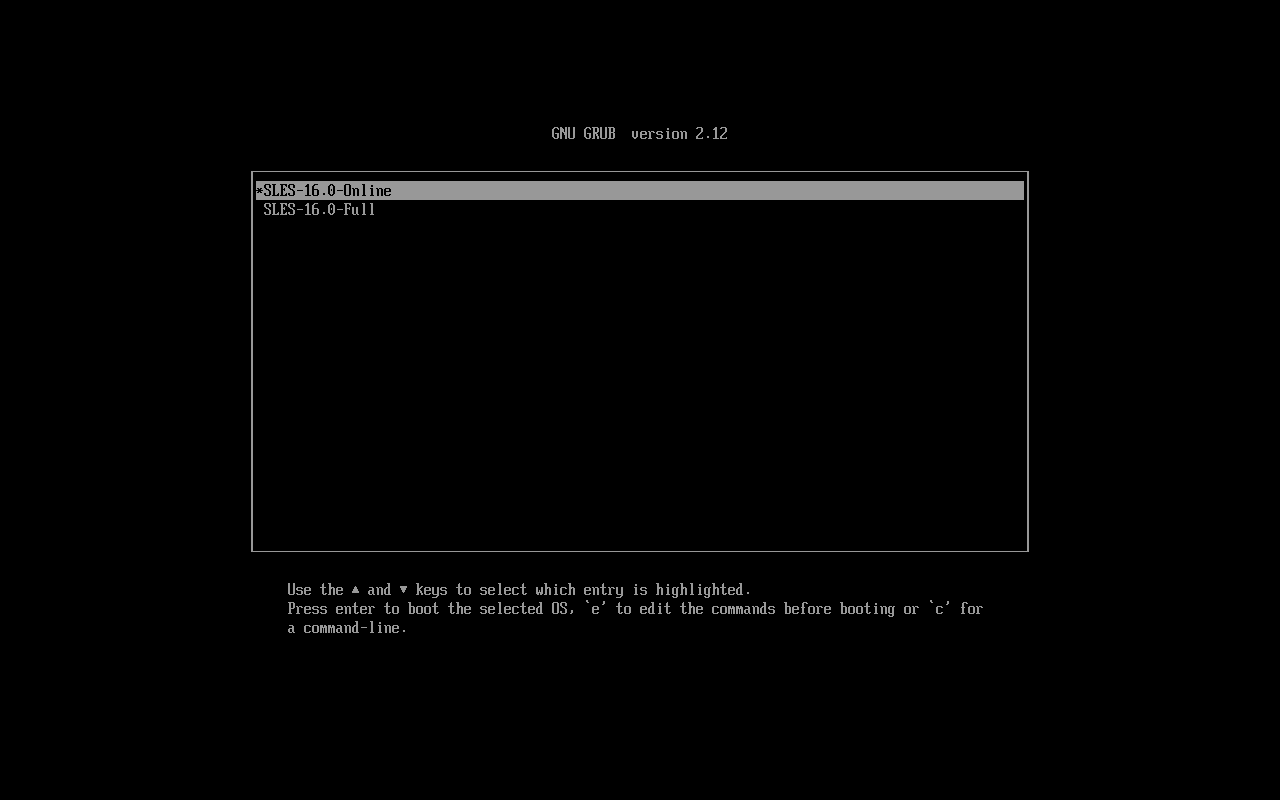
initrdare downloaded from the PXE boot server. Boot loader is started.In the GRUB 2 menu, select the installation target. You can pass kernel boot parameters if needed.
Figure 1: Select installation target in PXE boot menu #initrdconfigures the network and starts the SUSE Linux Enterprise Server deployment using Agama.
2.2 Installing SLES using Agama #
The following procedure provides a step-by-step description of how to manually install SLES using Agama from the remote server.
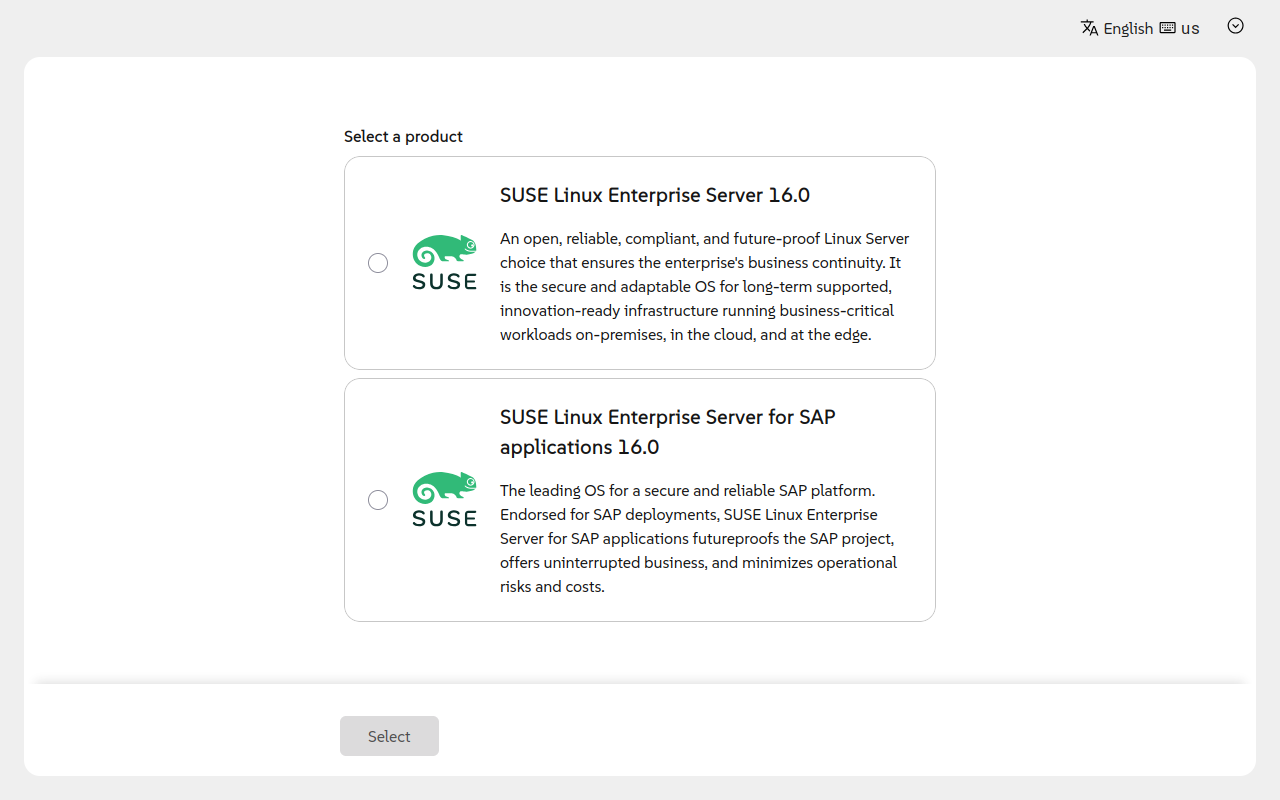
Select SUSE Linux Enterprise Server 16.0 for installation and accept the license to continue.
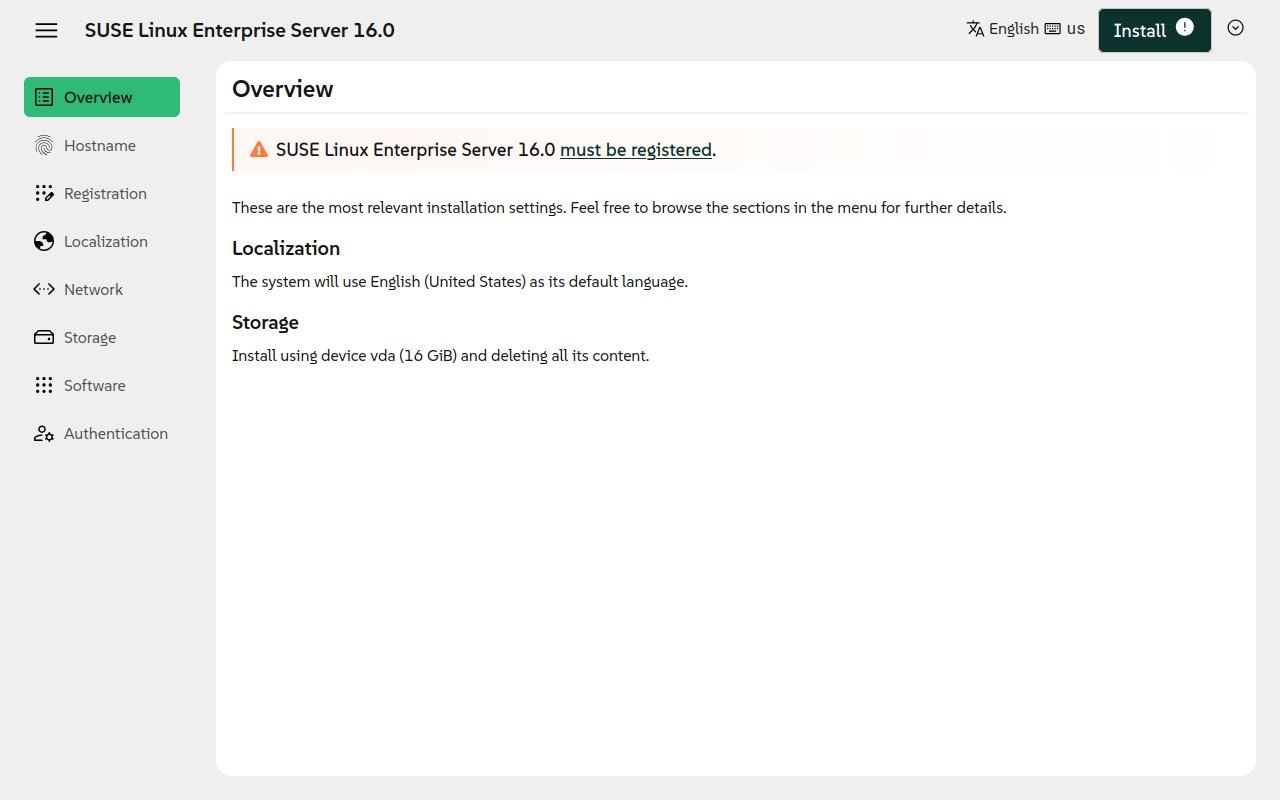
The overview of the most relevant installation settings is shown. Adjust the settings by selecting the category from the menu on the left or directly proceed with the installation.
Tip: Installer language and keyboardClick the arrow menu in the top-right corner and select to change the language and keyboard layout used by the installer. The language can only be changed on local installations. If you are using a Web browser for a remote installation, configure the preferred content language in the browser settings and reload the installer.
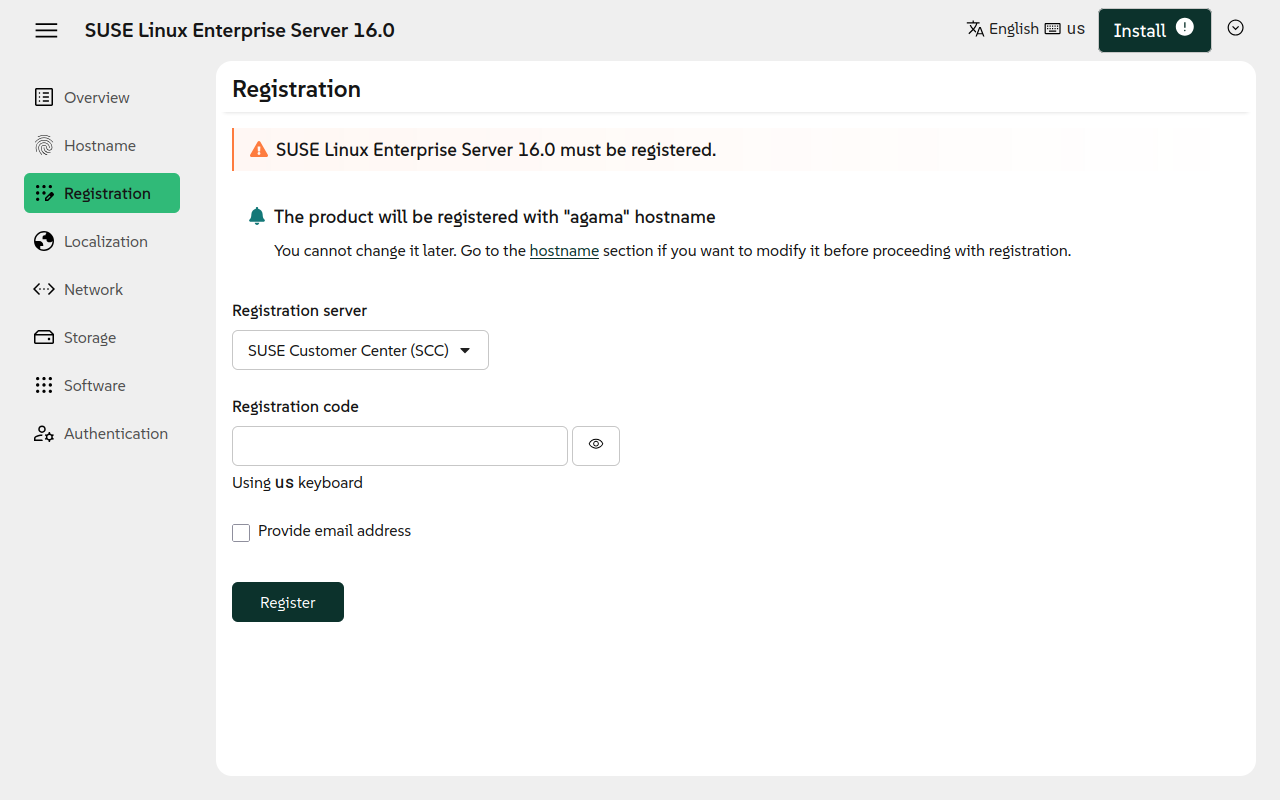
Register your product. Enter a registration code and, optionally, a valid e-mail address.
Note: Optional registration for images signed with the developer's keyImages signed with the developer's key may allow you to skip registration before installation. If your product's image supports installation without registration, you may see a pop-up similar to the following:
To install without registration, select on the pop-up.
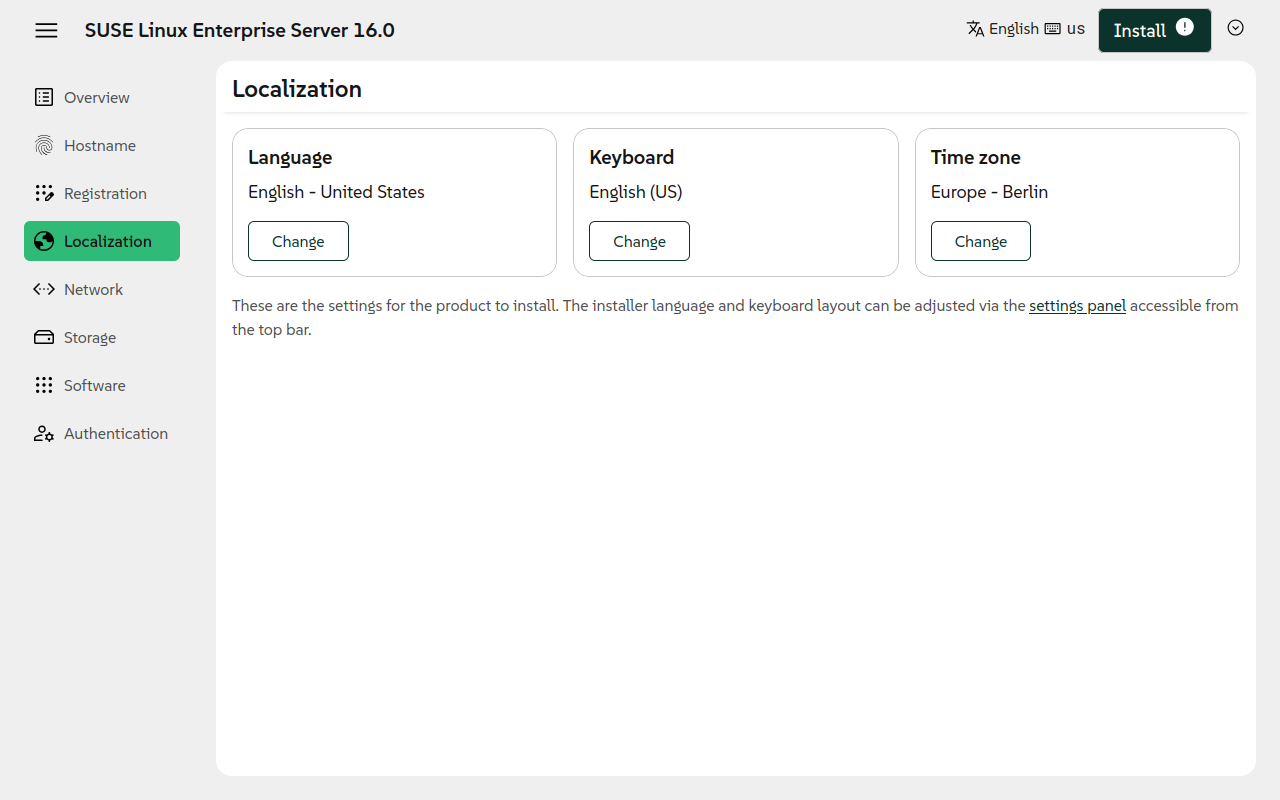
(Optional) Adjust your localization settings such as language, keyboard layout and time zone.
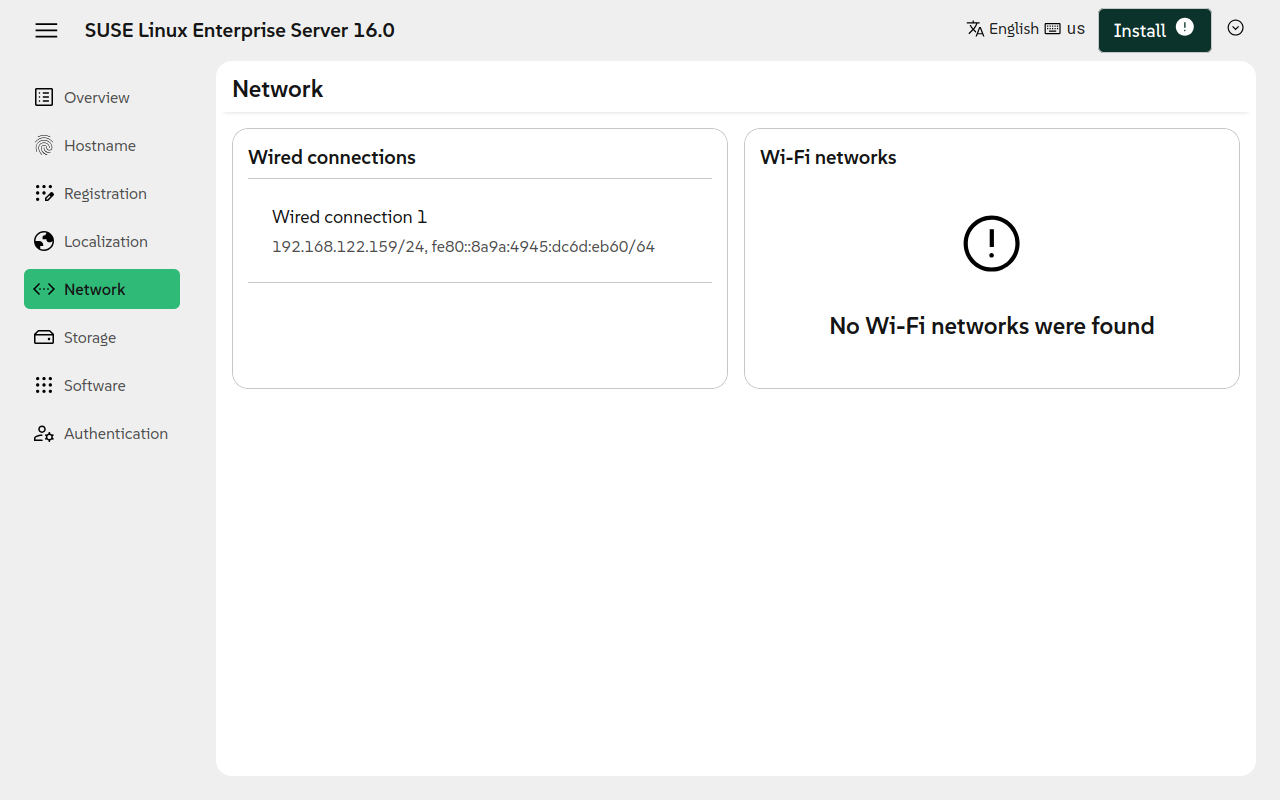
(Optional) Configure your network settings. To edit an existing network connection, click the three dots.
Select a storage device for installation.
Currently installations on single discs or LVM are supported. To change the disk or use LVM, click the device name button in the section.
To detect an iSCSI disk, select the iSCSI initiator and click .
By default, the file systems will be allocated as new partitions on the selected device. You can change this behavior in the drop-down list labeled in the section. The following space policies are available:
Space policies #- Delete current content
All partitions will be removed, and any data on the disks will be lost.
- Shrink existing partitions
The data is preserved, but current partitions will be shrunk as needed.
- Use available space
The data is preserved. Only the space not assigned to any partition will be used.
- Custom
Select what to do with each partition.
To edit individual partitions, expand the section by clicking on the symbol. Optionally, you can also configure Btrfs snapshots, boot options, and enable full disk encryption (FDE).
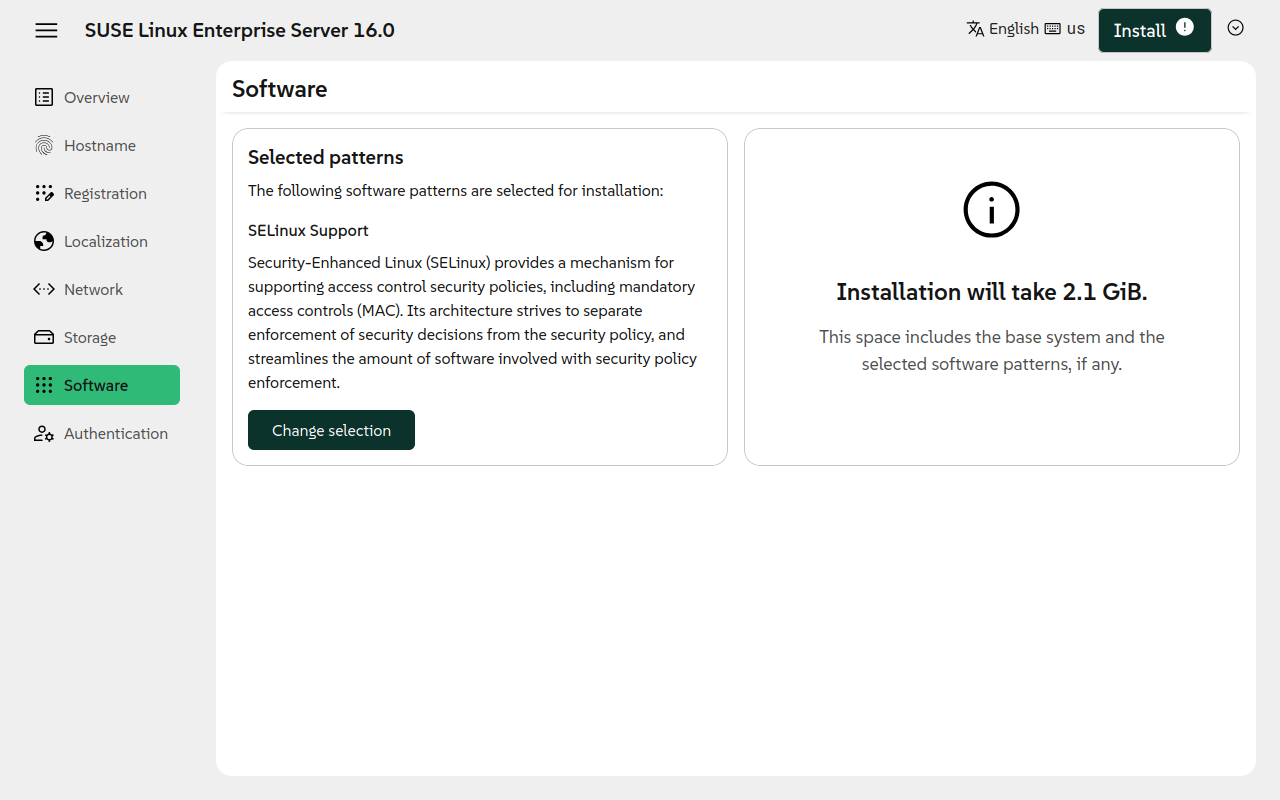
(Optional) Add additional software to install, such as the KVM hypervisor or Cockpit system management service.
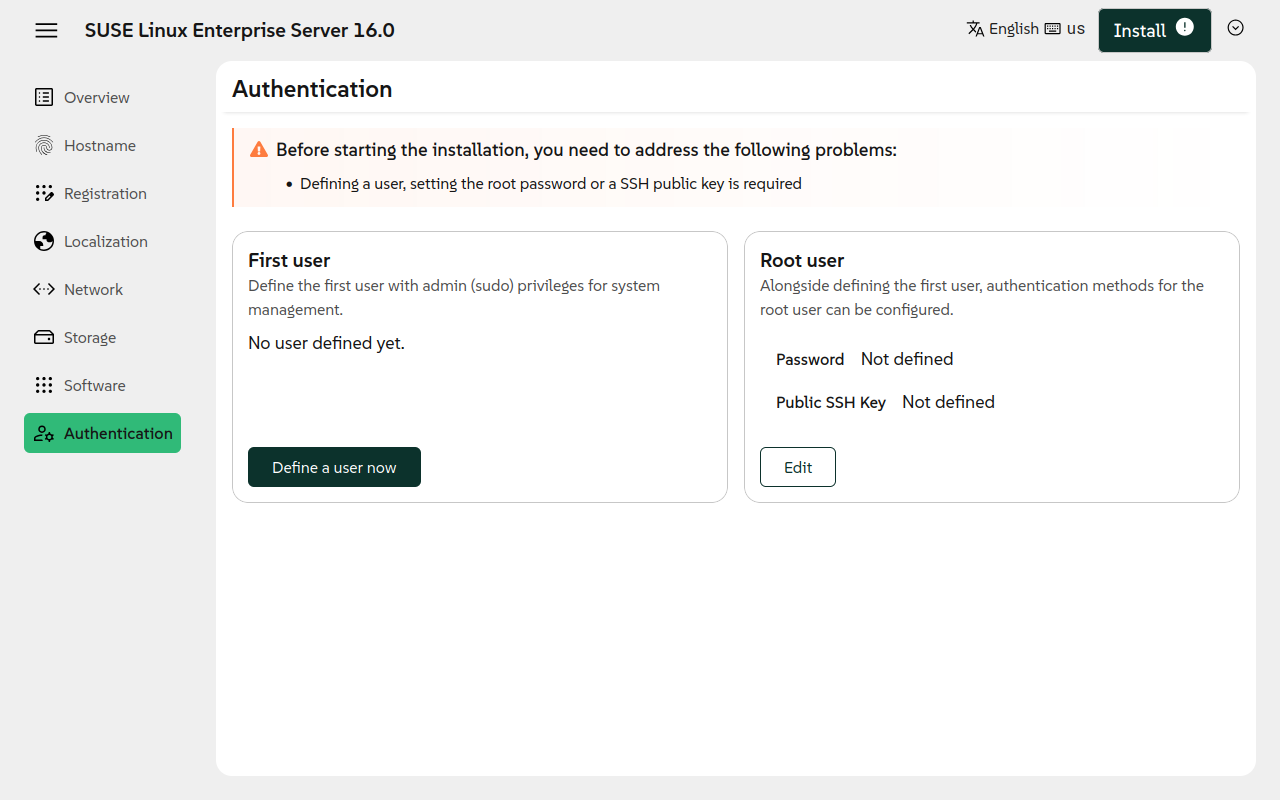
Configure the authentication settings.
Important: No SSHrootaccessSSH access for
rootis disabled by default. Therefore, it is strongly recommended to create a system user. The first system user is grantedsudoprivileges automatically and can also be used for accessing Cockpit.Create a non-root user. Click and enter details such as user name and password.
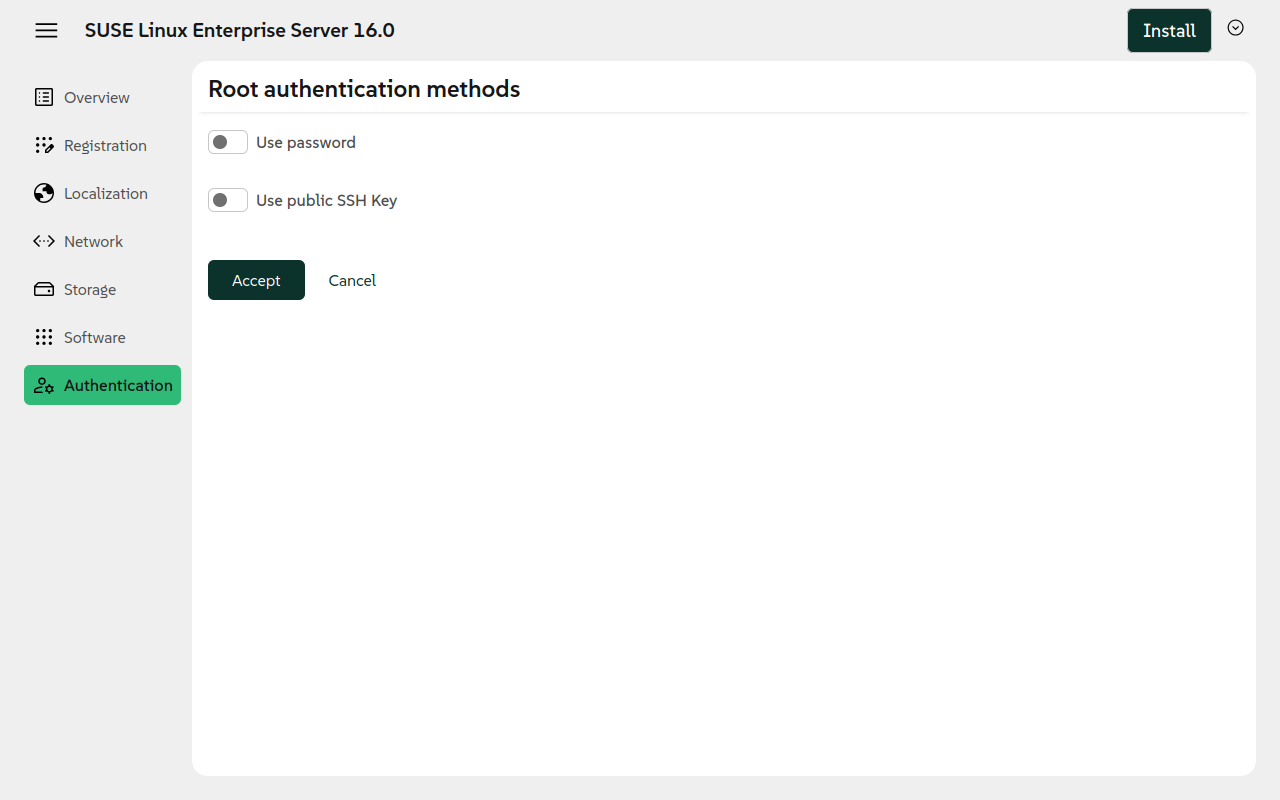
Configure the authentication methods for the
rootuser. You can use a secure password, an SSH public key, or both.
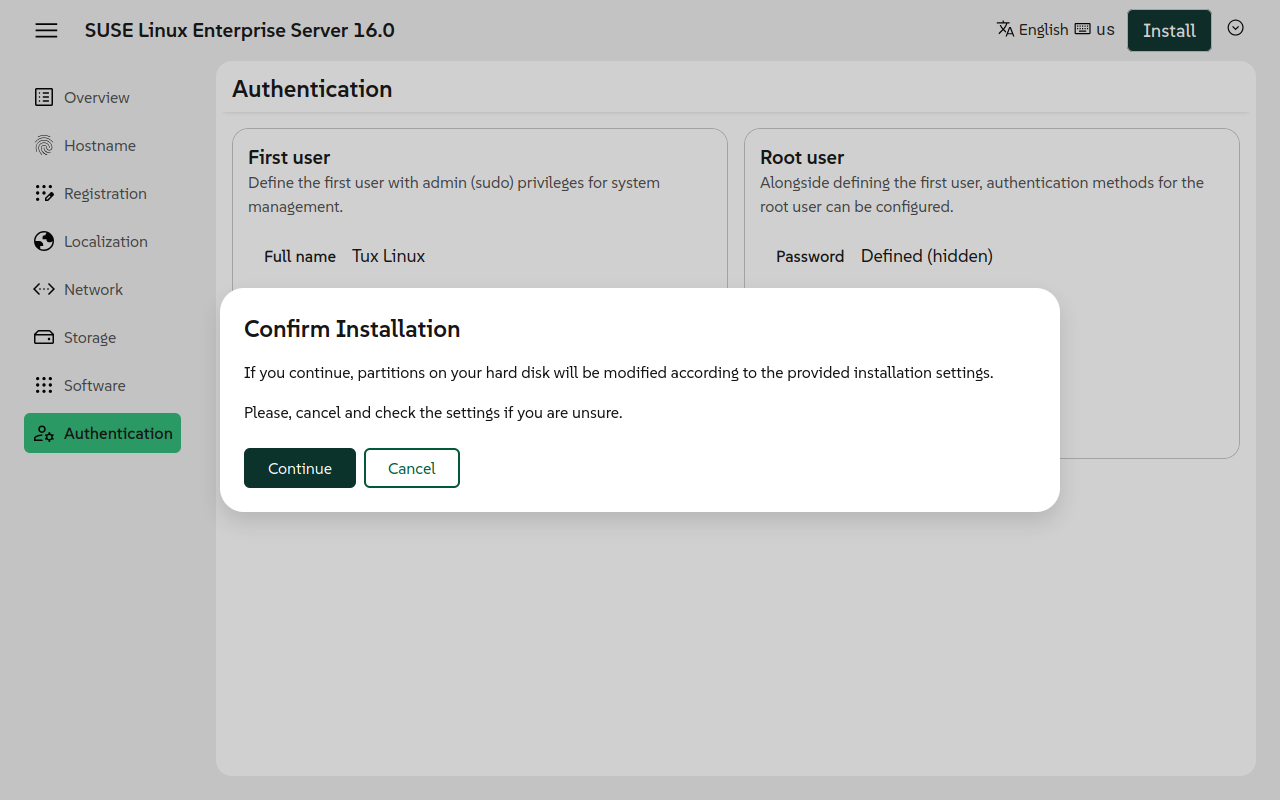
Click and confirm to start the installation.
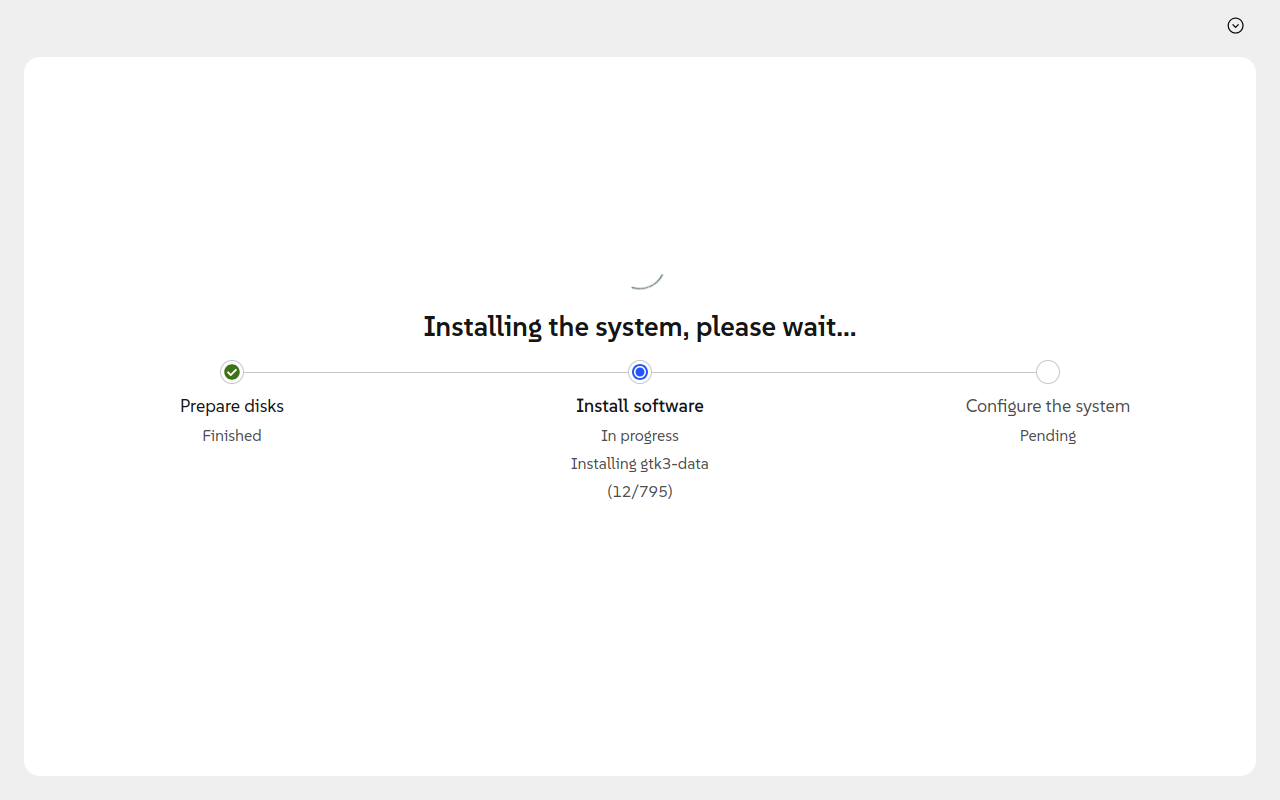
Wait for the system installation to complete. It takes around 30 minutes to complete the installation.
Tip: Installation logsYou can use the arrow menu in the top-right corner of the window to view the logs and system messages.
3 Legal Notice #
Copyright© 2006–2026 SUSE LLC and contributors. All rights reserved.
Permission is granted to copy, distribute and/or modify this document under the terms of the GNU Free Documentation License, Version 1.2 or (at your option) version 1.3; with the Invariant Section being this copyright notice and license. A copy of the license version 1.2 is included in the section entitled “GNU Free Documentation License”.
For SUSE trademarks, see https://www.suse.com/company/legal/. All other third-party trademarks are the property of their respective owners. Trademark symbols (®, ™ etc.) denote trademarks of SUSE and its affiliates. Asterisks (*) denote third-party trademarks.
All information found in this book has been compiled with utmost attention to detail. However, this does not guarantee complete accuracy. Neither SUSE LLC, its affiliates, the authors, nor the translators shall be held liable for possible errors or the consequences thereof.

