
Installing and configuring an RMT server
RMT (Repository Mirroring Tool) is a proxy system that mirrors software repositories and registers client machines within a private network. By acting as a local intermediary for SUSE Customer Center, RMT enables administrators to manage package updates and client registrations locally without direct external Internet access for every system, significantly enhancing network security and reducing bandwidth usage.
- REQUIREMENTS
A SUSE Linux Enterprise Server for SAP applications 16.1 system.
Valid SUSE Customer Center organization credentials.
Sufficient local storage space (approximately 1.5 times the size of all enabled repositories).
1 Introduction #
This article describes how to run an RMT server on SUSE Linux Enterprise Server for SAP applications 16.1. Install RMT directly during the installation of SUSE Linux Enterprise Server for SAP applications or install it on a running system. After the packages are installed, use Ansible to do an initial configuration.

Configuring a server to be an RMT server installs and configures the NGINX Web server, listening on port 80. However, configuring a machine to be an installation server automatically installs the Apache Web server and configures it to listen on port 80.
Do not try to enable both these functions on the same server. It is not possible for a single server to host both simultaneously.
2 RMT server storage and disk space requirements #
The amount of storage your RMT server requires depends on several variables: the number of repositories and architectures that you mirror, and the number of products that are enabled. As a general guide, 1.5 times the total size of all enabled repositories should be sufficient. This is about 200 GB per SUSE Linux Enterprise release, including all extensions.
Downloaded packages are stored in
/var/lib/rmt/public/repo/. Plan the size of the file
system that contains /var/lib/rmt accordingly.
The rmt-server package also installs the symbolic link
/usr/share/rmt/public/repo, which points to
/var/lib/rmt/public/repo/. Because the link is part
of the package and RMT writes only to
/var/lib/rmt, mirroring also works on systems where
/usr is read-only, such as immutable systems.

/tmp runs out of space
When RMT mirrors repositories from SUSE Customer Center, it writes large temporary files in /tmp.
If /tmp is too small, or is part of the /root file system, and
this file system is small in size, /tmp quickly runs out of space, resulting in a mirroring failure.
For more information, refer to https://support.scc.suse.com/s/kb/RMT-mirroring-fails-when-tmp-runs-out-of-disk-space?language=en_US.
3 Installing RMT during system installation #
Install RMT while installing SUSE Linux Enterprise Server for SAP applications with Agama by adding the rmt-server package to the installation profile.
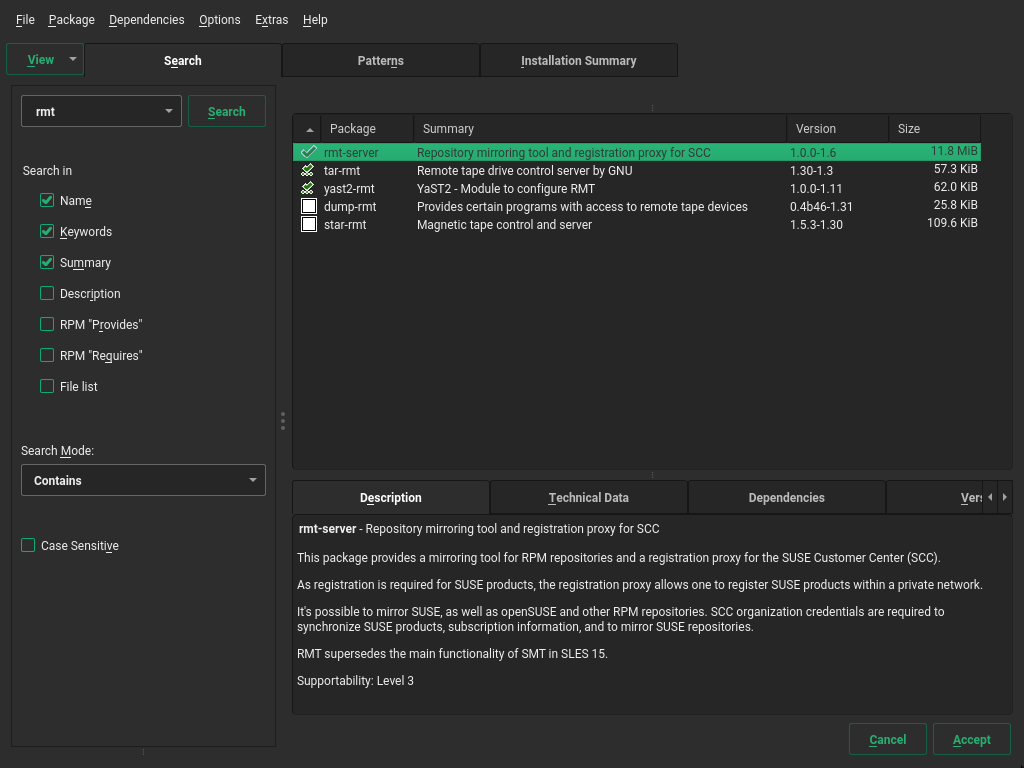
RMT is not available as a software pattern, and the Agama Web
interface only lets you select patterns. To install RMT during
installation, add the rmt-server package to the
software section of an Agama installation profile:
"software": {
  "packages": [
    "rmt-server"
  ]
}
The rmt-server package is available from the SUSE Linux Enterprise Server for SAP applications product repository, so no additional repository is required. If you install with the Agama Web interface instead, install RMT after the installation as described in Section 4, “Installing RMT on an existing SLES for SAP ”.
You can use the same machine both as an installation server that provides the installation media and as the RMT server. When installing client systems, specify this machine as the registration server.
Check for available RMT updates immediately after installing SLES for SAP
using the zypper patch command because SUSE
continuously releases maintenance updates for RMT.
4 Installing RMT on an existing SLES for SAP #
Install RMT on a running SUSE Linux Enterprise Server for SAP applications system with
zypper.
To install RMT on a running SUSE Linux Enterprise Server for SAP applications installation, use the
zypper command:
>sudozypper in rmt-server
5 Upgrading an RMT server from SUSE Linux Enterprise 15 to SLES for SAP 16.1 #
Carrying an existing RMT server across the distribution upgrade from SUSE Linux Enterprise 15 SP7 to SUSE Linux Enterprise Server for SAP applications 16.1 requires repairing two platform changes that leave RMT unavailable afterwards.
These two platform changes are:
Network stack replacement: SLES for SAP 16.1 completely removes the legacy
wickednetworking framework and standardizes on NetworkManager as the sole network control stack.Mandatory Access Control Framework: SLES for SAP 16.1 replaces
AppArmorwith SELinux toenforcingmode by default.
Upgrade the host itself using the distribution migration system, as described in Upgrading to SUSE Linux Enterprise Server for SAP applications 16.1. This section covers only the steps specific to a host running RMT.

The distribution migration system reports success for the distribution
upgrade, not for the services running on the host. Even when every
suse-migration-* unit finishes with
Result=success and
/var/log/distro_migration.exitcode contains
0, RMT does not start until you complete the steps
below.
5.1 Before the upgrade #
Back up the RMT configuration file and the RMT database to a location outside the host:
#cp /etc/rmt.conf /root/rmt.conf.backup#mysqldump --single-transaction rmt > /root/rmt.sqlRecord the ownership of the MariaDB data directory. On SUSE Linux Enterprise 15, as it belongs to the group
root, which breaks MariaDB after the upgrade:#ls -ld /var/lib/mysqldrwx------ 1 mysql root 442 /var/lib/mysql
The upgrade replaces wicked
with NetworkManager, which changes the DHCP client identifier. Consequently, a host using DHCP
is likely to receive a new IP address. Because clients registered
against this RMT server reach it through the URL stored in their
Zypper service definitions, assign the server a stable IP address or
host name before upgrading.
5.2 After the upgrade #
Check which services are running. RMT depends on MariaDB through
Requires=mariadb.service, so a failed database keeps RMT inactive:#systemctl --failed#systemctl is-active mariadb nginx rmt-serverCorrect the group ownership of the MariaDB data directory:
#chgrp -R mysql /var/lib/mysqlOn SUSE Linux Enterprise Server for SAP applications 16.1,
mariadb.servicecombinesStateDirectory=mysqlwithUser=mysqlandGroup=mysql. systemd therefore adjusts the ownership of/var/lib/mysqlon every start, and themysql:rootownership inherited from SUSE Linux Enterprise 15 makes that fail:mariadb.service: Failed to set up special execution directory in /var/lib: Permission denied mariadb.service: Control process exited, code=exited, status=238/STATE_DIRECTORY
The error is reported as a permission problem rather than an ownership one, which makes it easy to mistake for a file system or SELinux fault.
Start MariaDB:
#systemctl start mariadbAllow nginx to connect to the RMT back-end:
#setsebool -P httpd_can_network_connect onSUSE Linux Enterprise Server for SAP applications 16.1 uses SELinux in enforcing mode instead of AppArmor. The
httpd_can_network_connectboolean is off by default, which prevents nginx from opening a connection to the RMT back-end on127.0.0.1:4224. Without this setting, nginx answers every request that it proxies to RMT with502.Verify that RMT answers correctly:
#curl -o /dev/null -w '%{http_code}\n' http://localhost/connect/subscriptions/products401#curl -o /dev/null -w '%{http_code}\n' http://localhost/repo/200401is the expected answer on the registration endpoint: it shows that the RMT application is reachable and requires authentication. A502means that the previous step is incomplete.Restart the host and repeat the checks. Confirming the changes across a reboot is essential: SELinux boolean only persists when it is set with
-P, and MariaDB may not be independently enabled sincermt-server.servicemanages it viaRequires=.
SUSE Linux Enterprise 15 SP7 offers both RMT 2 and RMT 3, while SUSE Linux Enterprise Server for SAP applications 16.1 ships only RMT 3. A host still running RMT 2 therefore moves to RMT 3 as part of the distribution upgrade.
No action is required. /etc/rmt.conf and the
contents of the database are preserved, and
rmt-server-migration.service updates the database
schema before rmt-server.service starts. RMT 3
differs from RMT 2 in the Ruby and Rails versions it runs on,
not in its configuration file or its
rmt-cli commands.
Confirm the version after the upgrade:
#rmt-cli version
nginx serves /repo/ directly from disk, so clients
continue to download packages even when the RMT application is
unreachable and no client can register. Check the registration
endpoint, not just the repository paths.
6 Deploying RMT on top of the Kubernetes cluster #
This section describes how to deploy RMT on a Kubernetes cluster. It uses Helm as the package manager to interact with the Kubernetes cluster. Find more details about using Helm at https://helm.sh/docs/intro/using_helm/.
6.1 Prerequisites #
Running Kubernetes cluster
helmcommand configured to interact with the clusterA storage class for the persistent volumes of RMT and MariaDB. The example in Section 6.3, “The
values.yamlfile” uses thelocal-pathstorage class, which is only available in Rancher workloads. On other clusters, install thelocal-pathstorage provisioner:>kubectl apply -f https://raw.githubusercontent.com/rancher/local-path-provisioner/v0.0.26/deploy/local-path-storage.yamlAlternatively, set
app.storage.classanddb.storage.classto a storage class that already exists in your cluster.
6.2 Application components #
Each component of the RMT application is deployed in its own container. RMT consists of the following components:
- RMT server
Containerized version of the RMT application server with the ability to pass its configuration via Helm values. Storage is done on a volume that is allocated to the Kubernetes cluster. You need to adjust the size of the storage depending on the number of repositories you need to mirror.
- MariaDB
The database back-end for RMT. No post-installation task is needed since RMT creates the required database and tables at start-up. If passwords are not specified in the
values.yamlfile, they are generated automatically.- nginx
A Web server configured for RMT routes. Having a properly configured Web server allows you to target your Ingress traffic (for RMT) to this nginx service directly. You do not need to configure Ingress for RMT -specific path handling, as nginx is configured to take care of this itself.
6.3 The values.yaml file #
The RMT chart includes the values.yaml file
where all parameters are documented and their default values are
defined. You can override these values by providing your own values
file, for example:
> cat << EOF > rmt-config.yaml
---
app:
  storage:
    class: local-path1
  scc:
    enabled: false
    username: "UXXXXXXX"
    password: "PASSXXXX"
    products_enable:
      - SLES/15.3/x86_64
      - sle-module-python2/15.3/x86_64
    products_disable:
      - sle-module-legacy/15.3/x86_64
      - sle-module-cap-tools/15.3/x86_64
db:
  storage:
    class: local-path2
ingress:
  enabled: true
  hosts:
    - host: chart-example.local
      paths:
        - path: "/"
          pathType: Prefix
  tls:
    - secretName: rmt-cert
      hosts:
        - chart-example.local
EOFThe storage class for the RMT and MariaDB persistent volumes. The storage class must exist in the cluster, see Section 6.1, “Prerequisites”. |
And to install RMT, run:
> helm install rmtsle oci://registry.suse.com/suse/rmt-helm -f rmt-config.yaml6.3.1 Required values #
- Key: app.scc.password
Type: string
Default:
nilDescription: SUSE Customer Center proxy password. The password string needs to be put inside quotes. If the quote character
"is part of the string, it has to be escaped with\.- Key: app.scc.username
Type: string
Default:
nilDescription: SUSE Customer Center proxy user name. The user name string needs to be put inside quotes. If the quote character
"is part of the string, it has to be escaped with\.- Key: app.scc.products_enable
Type: list
Default:
[]Description: list of products to enable for mirroring
- Key: app.scc.products_disable
Type: list
Default:
[]Description: list of products to disable for mirroring
- Key: app.storage.class
Type: string
Default:
""Description: Kubernetes
storageclass.- Key: db.storage.class
Type: string
Default:
""Description: Kubernetes
storageclass.- Key: ingress.enabled
Type: bool
Default:
falseDescription: Ingress Enabled
- Key: ingress.hosts[0]
Type: object
Default:
{"host":"chart-example.local","paths":[{"path":"/","pathType":"Prefix"}]}Description: DNS name at which the RMT service will be accessible from clients
- Key: ingress.tls[0].hosts[0]
Type: string
Default:
"chart-example.local"Description: DNS name at which the RMT service will be accessible from clients
- Key: ingress.tls[0].secretName
Type: string
Default:
"rmt-cert"Description: TLS Ingress Certificate
7 Configuring RMT with Ansible #
Configure RMT with Ansible as described in the following procedure. The ansible-rmt-server package provides pre-built playbooks and roles for automated RMT configuration.
Navigate to the Ansible configuration directory:
#cd /usr/share/ansible/rmtCreate the configuration file
group_vars/all.ymlbased on the provided example:#cp group_vars/all.yml.example group_vars/all.ymlEdit
group_vars/all.ymland configure the following variables:rmt_db_usernameDatabase user name for RMT (default:
rmt)rmt_db_passwordSecure password for the RMT database user
RMT_ORGANIZATION_USERNAMEYour SUSE Customer Center organization credentials. To retrieve your credentials, refer to Mirroring credentials.
RMT_ORGANIZATION_PASSWORDYour SUSE Customer Center organization password
Example configuration:
---
rmt_db_username: rmt
rmt_db_password: "your_secure_password"

rmt:
  RMT_ORGANIZATION_USERNAME: "your_scc_username"
  RMT_ORGANIZATION_PASSWORD: "your_scc_password"
Run the Ansible playbook to configure RMT:
#ansible-playbook site.ymlThe playbook will automatically perform the following tasks:
Install required dependencies (MariaDB, nginx, Python modules)
Configure and start the MariaDB database service
Create the RMT database and database user
Generate SSL certificates for HTTPS
Configure nginx virtual hosts
Create
/etc/rmt.confconfiguration fileRun database migrations
Start and enable the RMT server service
On systems with SELinux in enforcing mode, allow nginx to connect to the RMT back end service:
#setsebool -P httpd_can_network_connect 1Verify the installation by checking the API health status:
#curl -s http://localhost/api/health/status{"state":"online"}

The Ansible playbook generates SSL certificates at the following locations:
- CA certificate
/etc/rmt/ssl/rmt-ca.crt- CA private key
/etc/rmt/ssl/rmt-ca.key- Server certificate
/etc/rmt/ssl/rmt-server.crt- Server private key
/etc/rmt/ssl/rmt-server.key
8 Enabling SLP announcements #
Enable SLP (Service Location Protocol) announcements so that clients can discover the RMT service on the network.
RMT includes the SLP service description file
/etc/slp.reg.d/rmt-server.reg. To enable SLP
announcements of the RMT service, follow these steps:
If
firewalldis running:Open relevant ports:
>sudofirewall-cmd --permanent --add-port=427/tcp success>sudofirewall-cmd --permanent --add-port=427/udp successReload the
firewalldconfiguration:>sudofirewall-cmd --reload
Verify that the SLP server is installed and install it if it is not:
>sudozypper install openslp-serverEnable and start the SLP service:
>sudosystemctl enable --now slpd.service
9 Accessing SUSE Customer Center from behind a firewall #
Allow the RMT server to reach SUSE Customer Center when it is located behind a
firewall that does not support host name allowlisting.
If the RMT server is behind a firewall and cannot access SUSE Customer Center directly, you need to allow connections to the following domains on both 80 and 443 ports on the firewall.
scc.suse.com
updates.suse.com
installer-updates.suse.com
If the firewall you are using does not support allowing connections from
host names —such as firewalld— allow connections to the below corresponding IP addresses.
Resolve the IP address of the domain, for example,
installer-updates.suse.com.>nslookup installer-updates.suse.com[...] Address: 152.199.22.115Add firewall rules for ports 80 and 443 for each discovered IP address.
Port 80:
>sudofirewall-cmd --permanent --zone=public \ --add-rich-rule='rule family="ipv4" source address="152.199.22.115" \ port protocol="tcp" port="80" accept'Port 443:
>sudofirewall-cmd --permanent --zone=public \ --add-rich-rule='rule family="ipv4" source address="152.199.22.115" \ port protocol="tcp" port="443" accept'
Reload the firewall configuration.
>sudofirewall-cmd --reload
10 RMT configuration files #
Reference of the options in the main RMT configuration file
/etc/rmt.conf and of the SSL certificate
locations used by RMT.
The main RMT configuration file is /etc/rmt.conf.
Configuration is performed using the Ansible playbooks provided in the
ansible-rmt-server package.
10.1 Main configuration file /etc/rmt.conf #
The initial configuration is performed using Ansible. Only the proxy configuration needs to be entered manually. The other configuration parameters are documented for reference.
All available configuration options can be found in the
/etc/rmt.conf file.
10.1.1 Mirroring settings #
The mirroring section lets you adjust mirroring
behavior.
mirror_srcDecides whether to mirror source RPM packages (architecture is
src).dedup_methodCreates hard links during mirroring when set to
hardlink. If the file system does not support hard links, it can be set tocopyinstead. Possible values:hardlink,copy.
10.1.2 HTTP client settings #
The http_client section defines the global HTTP
connection settings of RMT.
verboseEnables additional debug output to the
systemdjournal.proxyThe proxy server URL including the protocol and the port number. For example:
http://proxy_url:8080.noproxyA list of domains that should not go through the proxy, separated by commas. For example:
localhost.mylocaldomain.proxy_authThis setting determines the proxy authentication mechanism. Possible values are:
none,basic,digest,gssnegotiate,ntlm,digest_ie,ntlm_wb.proxy_userThe proxy server user name.
proxy_passwordThe proxy server password.
low_speed_limitLower speed limit when a download should be aborted in bytes/sec.
low_speed_timeTime until a download gets aborted, when download speed is below
low_speed_limit.
10.1.3 Settings for accessing SUSE repositories #
The scc section contains your mirroring
credentials for contacting SUSE Customer Center. To obtain your mirroring
credentials, see
Mirroring credentials.
Valid configuration keys for the section are:
usernameMirroring credentials user name.
passwordMirroring credentials password.
10.1.4 Web server settings #
The web_server section lets you tune the performance of your RMT server.
min_threadsSpecifies the minimum number of threads that an RMT server worker should spawn.
Acceptable values: Integer greater than or equal to 1.
max_threadsSpecifies the maximum number of threads that an RMT server worker should spawn.
Acceptable values: Integer greater than or equal to 1.
workersSpecifies the number of Web workers for RMT.
Acceptable values: Integer greater than or equal to 1.
11 Managing TLS/SSL certificates #
Regenerate the TLS/SSL certificates of your RMT server using the Ansible playbook when they expire.
11.1 SSL certificates and HTTPS #
By default access to API endpoints consumed by
SUSEConnect is limited to HTTPS only. nginx is
configured to use an SSL certificate and a private key from the following
locations:
Certificate:
/etc/rmt/ssl/rmt-server.crtPrivate key:
/etc/rmt/ssl/rmt-server.key
The Ansible playbook generates a custom certificate authority which is used to sign HTTPS certificates. This means that to register, this certificate authority must be trusted by the client machines:
For registrations during installation from the media or with YaST Registration module, a message will appear, prompting to trust the server certificate.
For registering a client system on the command line, use the
rmt-client-setupscript.
11.2 Regenerating HTTPS certificates #
HTTPS certificates should be regenerated before they expire. No additional actions are required on the client machines registered to the RMT server if only HTTPS certificates are regenerated.
The playbook generates a self-signed server certificate that carries
neither a common name nor subject alternative names, and that is not
signed by the CA certificate in
/etc/rmt/ssl/rmt-ca.crt. Clients that verify host
names reject such a certificate. If your clients verify the server
certificate, issue one yourself with a common name, the required
subject alternative names and a signature from your CA, then store it
as /etc/rmt/ssl/rmt-server.crt together with its
key in /etc/rmt/ssl/rmt-server.key. Note that any
subsequent run of the playbook overwrites both files.
Stop nginx and rmt-server services.
#systemctl stop nginx#systemctl stop rmt-serverRemove previously generated certificates.
#rm /etc/rmt/ssl/rmt-server.*Regenerate certificates using the Ansible playbook:
#cd /usr/share/ansible/rmt#ansible-playbook site.yml
11.3 Regenerating CA certificates and HTTPS certificates #
CA certificates can be regenerated after they have expired or in case of security issues.
The newly generated CA certificate must be imported on all clients
registered to the RMT server. This can be done by running the
rmt-client-setup script on the client machines.
Stop nginx service. rmt-server services.
#systemctl stop nginxStop rmt-server service.
#systemctl stop rmt-serverRemove previously generated CA and HTTPS certificates.
#rm /etc/rmt/ssl/rmt-ca.* rm /etc/rmt/ssl/rmt-server.*Regenerate certificates using the Ansible playbook:
#cd /usr/share/ansible/rmt#ansible-playbook site.yml
12 For more information #
To learn more about RMT, refer to the following resource:
13 Legal Notice #
Copyright© 2006– 2026 SUSE LLC and contributors. All rights reserved.
Permission is granted to copy, distribute and/or modify this document under the terms of the GNU Free Documentation License, Version 1.2 or (at your option) version 1.3; with the Invariant Section being this copyright notice and license. A copy of the license version 1.2 is included in the section entitled “GNU Free Documentation License”.
For SUSE trademarks, see https://www.suse.com/company/legal/. All other third-party trademarks are the property of their respective owners. Trademark symbols (®, ™ etc.) denote trademarks of SUSE and its affiliates. Asterisks (*) denote third-party trademarks.
All information found in this book has been compiled with utmost attention to detail. However, this does not guarantee complete accuracy. Neither SUSE LLC, its affiliates, the authors, nor the translators shall be held liable for possible errors or the consequences thereof.