
Introduction to the Hawk Web Interface
Hawk is a Web-based graphical interface for configuring and managing SUSE Linux Enterprise High Availability clusters. You can use Hawk on any Linux or non-Linux machine with a Web browser and network access to the cluster nodes. This article introduces some of Hawk's basic concepts and usage.
Requirements:
Cluster nodes with the hawk2 package installed and the
hawkandhawk-backendservices enabledA client machine with network access to the cluster nodes and a Web browser with JavaScript and cookies enabled
1 What is Hawk? #
Hawk (HA Web Konsole) is a Web-based graphical interface for configuring and managing SUSE Linux Enterprise High Availability clusters. You can use Hawk on any Linux or non-Linux machine (the client machine) with a Web browser and network access to the cluster nodes.
You can access Hawk using the IP address of any node in the cluster that has the Hawk
service running. Alternatively, you can create a floating, virtual IP address so that you
can access Hawk with a consistent address. If you install the cluster with
crm cluster init, the setup script can create the virtual IP address
for you. Hawk uses the HTTPS protocol and port 7630.
Most screens in Hawk refresh in near real time, so cluster configuration changes are visible almost immediately.
1.1 Requirements #
- Client requirements
To connect to Hawk, the client machine must have network access to the cluster nodes.
To use Hawk, the client machine must have a graphical Web browser with JavaScript and cookies enabled.
- Cluster node requirements
The hawk2 package must be installed on the node that you want to connect to. This is a recommended package in the ha_sles pattern, so it is typically installed on all nodes as part of the cluster installation.
The
hawkandhawk-backendservices must be started on the node that you want to connect to. If you installed the cluster withcrm cluster init, these services are already enabled.Hawk users must be members of the
haclientgroup. If you installed the cluster withcrm cluster init, the userhaclusteris created by default. You can also create a new user in thehaclientgroup.Hawk users must have secure passwords. If you installed the cluster with
crm cluster init, a default password is set for thehaclusteruser. Before starting Hawk, change the default password to a secure password.For operations that use SSH,
haclusteruses passwordless SSH authentication for communication between the nodes. If you added nodes to the cluster withcrm cluster join, the SSH keys are already configured.By default, Hawk generates and presents a self-signed certificate. We recommend replacing the generated certificate with your own certificate, or a certificate that was signed by an official Certificate Authority.
1.2 Top-level row #
Hawk's top-level row shows the following options:
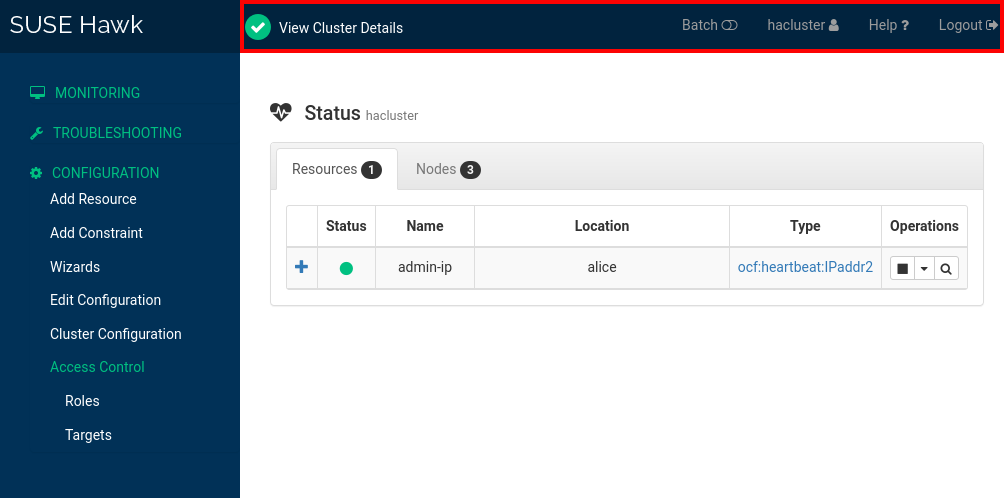
View details such as the cluster's status, which node is the Designated Coordinator, and the Pacemaker version, for example. Certain items are underlined, which means you can hover the cursor over them for more information.
Switch to batch mode. This allows you to simulate and stage changes and to apply them as a single transaction.
Set preferences for Hawk, such as the language for the Web interface, or whether to display a warning if fencing is disabled.
Access the SUSE Linux Enterprise High Availability documentation, read the release notes or report a bug.
Log out of Hawk.
1.3 Left navigation bar #
Hawk's left navigation bar shows the following options:
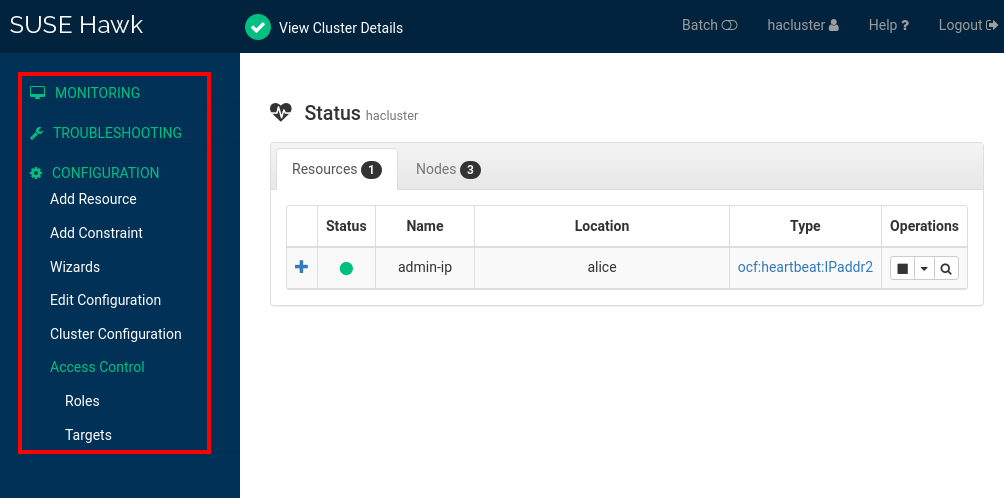
: Displays the current cluster status at a glance.
: Allows you to monitor multiple clusters.
: Opens the , from which you can generate cluster reports.
: Lists the
crmcommands recently run by Hawk.
: Opens the resource configuration screen.
: Opens the constraint configuration screen.
: Allows you to select from several wizards that guide you through the creation of resources for a certain workload, for example, a DRBD block device.
: Allows you to edit resources, constraints, node names and attributes, tags, alerts, and fencing topologies.
: Allows you to modify global cluster options and defaults.
› : Allows you to create roles (sets of rules describing access rights to the CIB) for access control lists (ACLs).
› : Allows you to create ACL targets (users) and assign roles to them.
2 Replacing Hawk's self-signed certificate #
By default, Hawk generates and presents a self-signed certificate. We recommend replacing the generated certificate with your own certificate, or a certificate that was signed by an official Certificate Authority.
Hawk supports wild card certificates. A wild card certificate is a public key certificate
that is valid for multiple sub-domains. For example, a wild card certificate for
*.example.com is valid for www.example.com,
login.example.com, etc.
Perform this procedure on every node that the Hawk service is running on:
Replace
/etc/hawk/hawk.keywith the new private key.Replace
/etc/hawk/hawk.pemwith the new certificate for Hawk to present.Change ownership of the files to
root:haclientand make the files accessible to the group:>sudo chown root:haclient /etc/hawk/hawk.key /etc/hawk/hawk.pem>sudo chmod 640 /etc/hawk/hawk.key /etc/hawk/hawk.pemRestart the Hawk services to reload the new certificate:
>sudo systemctl restart hawk-backend hawk
3 Logging in to Hawk #
Hawk allows you to manage a High Availability cluster using a graphical Web browser. You can also configure a floating, virtual IP address that allows clients to connect to Hawk no matter which node the Hawk service is running on.
By default, the hacluster user has read/write permissions for cluster
configuration tasks. You can also use access control lists (ACLs) to fine-tune access
permissions for other users. If ACLs are enabled, the available functions in Hawk depend on
the user's role and access permissions. However, the can
only be used by the user hacluster.
The client machine must be able to connect to the cluster nodes.
The client machine must have a graphical Web browser with JavaScript and cookies enabled.
This procedure uses the default hacluster user.
Open a Web browser and go to
https://HAWKSERVER:7630/, replacing HAWKSERVER with the IP address or host name of a cluster node, or the Hawk virtual IP address if one is configured. Note: Certificate warning
If a certificate warning appears when you access the URL for the first time, a self-signed certificate is in use. To verify the certificate, ask your cluster operator for the certificate details. To proceed anyway, you can add an exception in the browser to bypass the warning.
On the Hawk login screen, enter the and of the
haclusteruser.Click . Hawk shows the screen by default.
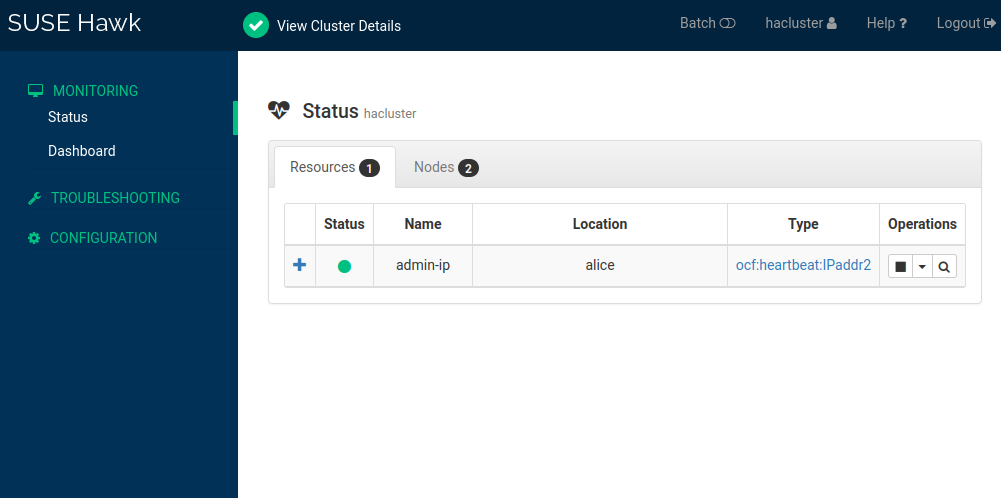
4 Hawk's screen #
After you log in to Hawk, the screen is displayed by default.
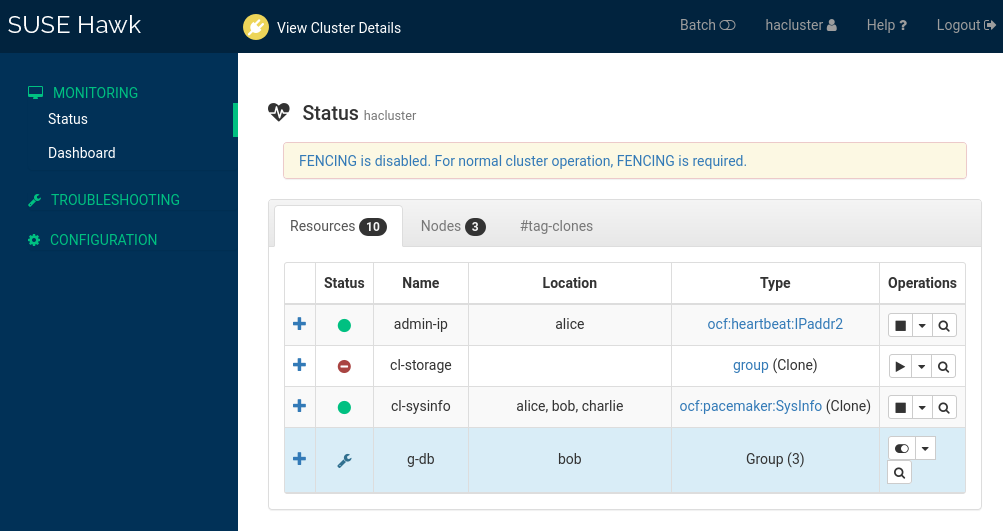
An icon in the upper-left corner shows the cluster status at a glance. Further details are shown in the following sections:
- Errors
Cluster configuration errors are shown at the top of the page. You can click an error to automatically generate a report in the .
The tab shows the following information about the cluster resources:
Plus icon: Click this icon to show the child resources in groups or clones.
: An icon showing the resource's status, such as started, stopped or maintenance mode.
: The resource's ID.
: Which node the resource is currently running on.
: The specific resource agent.
: A menu of actions that you can take on the resource, such as stopping, migrating, editing or switching to maintenance mode.
The tab shows the following information about the cluster nodes:
: An icon showing the node's status, such as online, offline, or Designated Coordinator.
: The node's ID.
: A toggle that switches maintenance mode on or off.
: A toggle that switches standby mode on or off.
: A menu of actions that you can take on the resource, such as viewing recent events, editing or fencing.
- Tags
If you create a resource tag, it appears as an additional tab next to the tab. The tab shows the resources included in the tag and has the same columns as the tab. Tag tabs also include an extra drop-down menu that allows you to start or stop all the child resources at once.
5 Hawk's screen #
You can use the screen to monitor multiple clusters. The clusters must all be running the same version of SUSE Linux Enterprise High Availability.
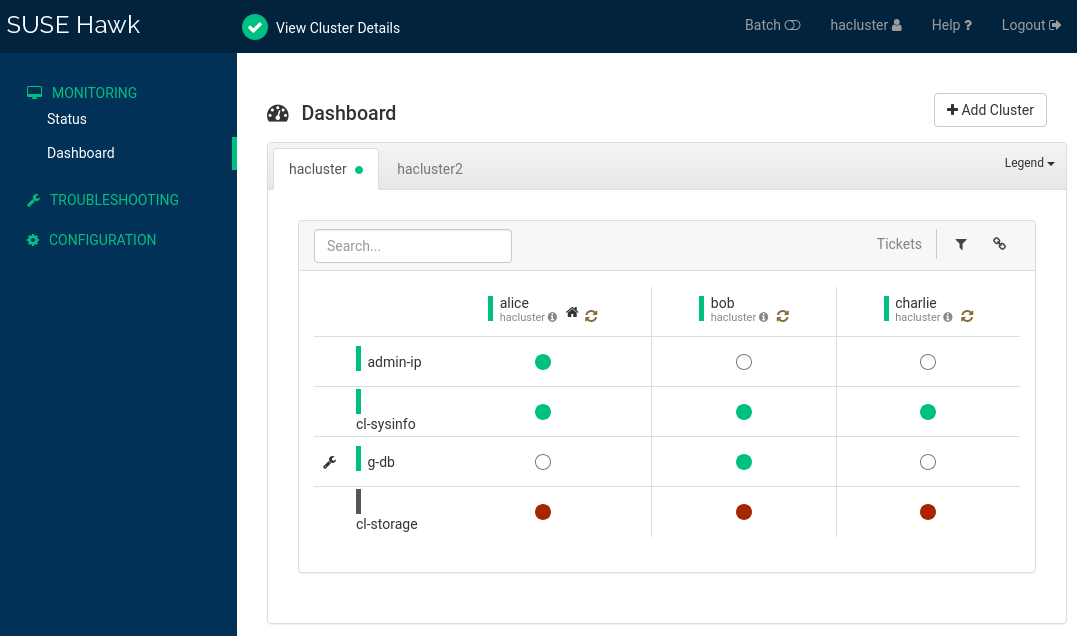
The screen has the following functions:
- Main dashboard
The main dashboard view shows the resources and nodes in the current cluster. For more information about the icons used in this view, click . To search for a resource, use the text box. To only show specific nodes, click the filter icon and select a filtering option.
- Add a cluster dashboard
To add a dashboard for another cluster, click and enter the cluster details. Hawk displays a second tab for the newly added cluster.
 Tip: Connection error
If you are prompted to connect to this cluster by entering a password, you might not have replaced the self-signed certificate yet. In that case, even after you enter the password, the connection fails with the following message:
Error connecting to server. Retrying every 5 seconds...To resolve this issue, replace the self-signed certificate. Alternatively, log in to Hawk on the new cluster's nodes and either verify the self-signed certificate or add an exception in the browser to bypass the warning.
- Switch to another cluster
To view more details for a cluster or to manage it, switch to the cluster's tab and click the chain icon. Hawk opens the view for this cluster in a new browser window or tab.
- Remove a cluster dashboard
To remove a cluster from the dashboard, click the
xicon on the right-hand side of the cluster's details. You can only remove additional clusters, not the main cluster.
6 Using batch mode #
Hawk's batch mode allows you to stage configuration changes and apply them all as a single transaction, instead of having each change take effect immediately. This can be useful when configuring resources that are dependent on one another and require constraints.
Batch mode also includes a cluster simulator, which shows the expected outcome of each change without affecting the live cluster. For example, if you stop a resource while in batch mode, the user interface shows the resource as stopped, but in the live cluster the resource is still running.
You can also inject cluster events, such as node changes and resource operations, to explore potential failure scenarios. These changes are only simulations, and won't be applied to the live cluster along with the configuration changes.

Certain wizards include actions beyond cluster configuration, such as installing packages. When using those wizards in batch mode, any changes that go beyond cluster configuration would be applied to the live system immediately.
Therefore, wizards that require root permission can't be used while in batch mode.
In a Web browser, go to
https://HAWKSERVER:7630/and log in.In the top-level row, click .
An additional bar appears below the top-level row to indicate that batch mode is active. This bar also includes the options to show, discard or apply your changes.
 Figure 6: Hawk batch mode bar #
While batch mode is active, perform any changes to your cluster, like adding or editing resources and constraints, or editing the cluster configuration. The changes will be simulated but are not applied to the live cluster yet.
To view details of your changes, select from the batch mode bar.
The window opens and shows the difference between the live cluster and the simulated changes in
crmshsyntax. Lines starting with a-character represent the current state, whereas lines starting with+show the proposed state.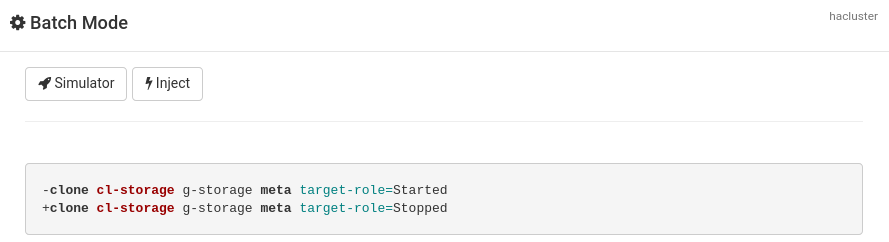 Figure 7: Hawk Batch Mode window #
(Optional) To test potential failures or to see how the cluster behaves in a specific scenario, you can simulate node changes and resource operations:
Simulate a node failure or status change:
Click › .
Select a and the node to simulate.
Click .
Simulate a resource operation:
Click › .
Select a and the to simulate.
If necessary, define an .
Select the on which to run the operation.
Select the operation to simulate.
Click .
The window shows a new line per injected event. Any event listed here is simulated immediately and is reflected on the screen.
To remove an injected event, click the icon next to it. Hawk updates the screen accordingly.
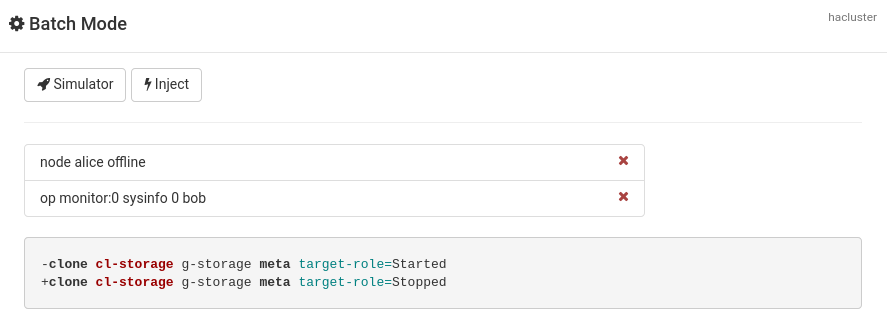 Figure 8: Hawk Batch Mode window with injected events #
(Optional) To view more details about the changes, click and choose one of the following:
: Shows a detailed summary.
: Shows the initial CIB state.
: Shows what the CIB would look like after the transition.
: Shows a graphical representation of the transition.
: Shows an XML representation of the transition.
After reviewing your changes, click to exit the window.
Choose whether to keep your changes or discard them:
To keep your changes, click in the batch mode bar. The window opens and shows a list of the changes. Only configuration changes are applied; injected events are not. Click to confirm.
To discard your changes, click in the batch mode bar, then click to confirm.
Both options deactivate batch mode and take you back to normal mode.
7 Using the configuration wizards #
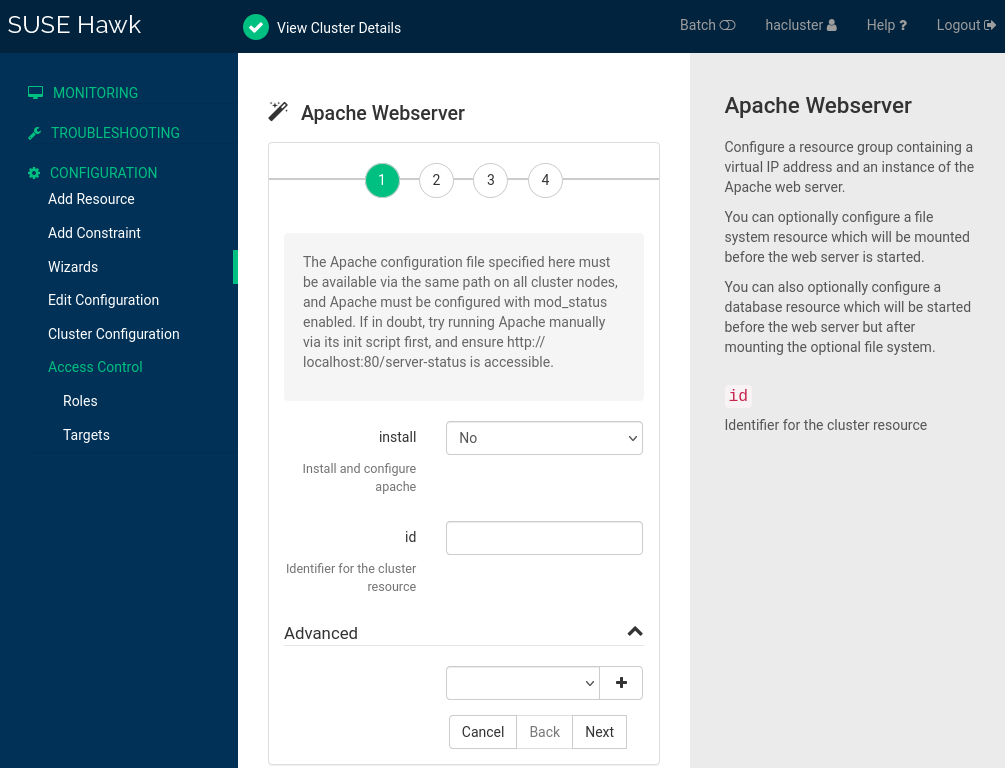
The Hawk help you configure resources, from simple resources like a virtual IP address to complex configurations like a DRBD block device or an Apache Web server. The wizard guides you through the configuration steps and provides information about the parameters you need to enter.
In a Web browser, go to
https://HAWKSERVER:7630/and log in.From the left navigation bar, select › .
Select the wizard you want to use. You can expand the different categories by clicking the down arrow icons.
Follow the instructions on the screen. Hawk shows a description for each parameter.
If the wizard has more than one step, click to go to the next step.
After the last step, click . Hawk shows a list of the actions it will perform and what the configuration will look like.
Click . Depending on the configuration, you might be prompted for the
rootpassword.The list of steps turns green if the configuration was applied successfully.
8 Legal Notice #
Copyright© 2006– 2026 SUSE LLC and contributors. All rights reserved.
Permission is granted to copy, distribute and/or modify this document under the terms of the GNU Free Documentation License, Version 1.2 or (at your option) version 1.3; with the Invariant Section being this copyright notice and license. A copy of the license version 1.2 is included in the section entitled “GNU Free Documentation License”.
For SUSE trademarks, see https://www.suse.com/company/legal/. All other third-party trademarks are the property of their respective owners. Trademark symbols (®, ™ etc.) denote trademarks of SUSE and its affiliates. Asterisks (*) denote third-party trademarks.
All information found in this book has been compiled with utmost attention to detail. However, this does not guarantee complete accuracy. Neither SUSE LLC, its affiliates, the authors, nor the translators shall be held liable for possible errors or the consequences thereof.