Let’s Encrypt is a free, automated, and open Certificate Authority.
Its Root is trusted by all major operating systems now. For SUSE Linux
Enterprise Server 12 SP3 and higher, the ISRG Root X1 is available in
/etc/ssl/certs/ISRG_Root_X1.pem. If not, apply the
latest updates for your operating system.
Let’s Encrypt has several clients to choose from depending on your needs.
For this example, we will be using the acme.sh client,
which is written in bash and gives us greater flexibility and ease in our
solution.
The next steps walk you through the installation of acme.sh and the issue
of a certificate with Let’s Encrypt followed by the automated load
of the certificate in OpenStack for the various API endpoints available.
Procedure 3.10. Installation of acme.sh letsencrypt client
Login to your crowbar/admin server change to the root directory.
Create a new directory for letsencrypt and clone the
acme.shrepo:# mkdir letsencrypt # cd letsencrypt # git clone https://github.com/Neilpang/acme.sh.git # cd acme.shThe system is prepared for installing
acme.sh.Install
socat:# export BRANCH=2 #this makes sure you are using the v2 api version of letsencrypt # zypper in -y socatInstall
acme.sh:# ./acme.sh --installAfter the install of
acme.shis finished, you should see a new directory/root/.acme.sh/whereacme.shlives and all of its environment, account info, and certificates are stored. We recommend using this as a backup location if you are using a backup tool.
Procedure 3.11. Issue a wildcard SSL Certificate
OpenStack and wildcard SSL uses the DNS validation method by validating your domain using a TXT record that can either be added manually or using the many (over 3 dozen) available DNS API’s.
Note
It is important to a wildcard certificate as you have the ability to use the same one for all of your public API endpoints in the OpenStack Cloud environment. Additional Cloud Native services like Kubernetes can also take advantage of it.
The manual DNS mode is a method that displays the DNS records that have to be created in your DNS servers. It is beneficial to automate the injection of DNS records as the maximum days a certificate is viable is 60 days. In order to issue your wildcard certificate, the command without optional settings is:
# acme.sh --issue -d yourdomain.com -d *.yourdomain.com --dnsTo debug or test, add the following optional settings:
# acme.sh --debug --test –issue -d yourdomain.com -d *.yourdomain.com --dnsA message returns. For example:
        Add the following TXT record:
        Domain: '_acme-challenge.yourdomain.com'
        TXT value: 'KZvgq3MpOCjUNW7Uzz5nE5kkFdplNk66WGfxE9-H63k'
        Please be aware that you prepend _acme-challenge. before your domain
        so the resulting subdomain will be: _acme-challenge.yourdomain.com
Using this information, you are ready to insert this TXT record into your DNS.
Note
When setting this up for SUSE OpenStack Cloud with Crowbar, you need to have your external DNS server appended to
/etc/resolv.confin order to resolve as crowbar has its own internal DNS. It is not enough to change it in the barclamp as you need the DNS server entry to be at the top of the list inresolv.conf. Crowbar returns to the default after a period of time. Keep in mind that if you want to automate this step every 90 days then you need to ensure theresolv.confchanges every time to bypass the local crowbar DNS Server.In order to set up TXT record in bind DNS, edit the zone file so it looks like the following example:
        yourdomain.com.     IN NS           admin.yourdomain.com.
        _acme-challenge.yourdomain.com. IN TXT "xxxx...your TXT value string here"
Restart your named services for
bind.Issue the acme-challenge verification of the previous step with the following command:
# acme.sh --renew -d yourdomain.comIf the DNS validation is okay,
acme.shissues a wildcard certificate and displays the certificate and private-key path. For example:Your cert is in: /root/.acme.sh/susedojo.com/susedojo.com.cer Your cert key is in: /root/.acme.sh/susedojo.com/susedojo.com.key v2 chain. The intermediate CA cert is in: /root/.acme.sh/susedojo.com/ca.cer And the full chain certs is in: /root/.acme.sh/susedojo.com/fullchain.cer_on_issue_successNotice the location of your certificate and key. These are now ready to be used by OpenStack Cloud.
To automate the process of setting up the TXT record in your DNS servers and prepare it for automated validation, the file
account.confholds account information for the DNS Provider. After exporting the authentication variables, it stores them automatically after the command is executed for later use. To issue your wildcard certificate, the command without optional settings is:# export LUA_Key=”your_API_token_from_account” # export LUA_Email=”cameron@yourdomain.com” # acme.sh -d yourdomain.com -d *.yourdomain.com --dns dns_luaYou can now view your DNS records and you will see a new TXT record available. When it is finished and the DNS validation is okay,
acme.shissue your wildcard certificate and displays your certificate and private-key path just as before.Your cert is in: /root/.acme.sh/susedojo.com/susedojo.com.cer Your cert key is in: /root/.acme.sh/susedojo.com/susedojo.com.key v2 chain. The intermediate CA cert is in: /root/.acme.sh/susedojo.com/ca.cer And the full chain certs is in: /root/.acme.sh/susedojo.com/fullchain.cer_on_issue_success
Procedure 3.12. Set Up Certificate Store on Control and Compute Nodes
Create a shared location for all Certificates on the control nodes. Execute these commands on all control nodes and compute nodes:
        mkdir -p /etc/cloud/ssl/certs
        mkdir -p /etc/cloud/ssl/private
Copy all certificates to their shared locations on the control nodes and compute nodes:
        # scp /root/.acme.sh/susedojo.com/susedojo.com.cer \ root@control:/etc/cloud/ssl/certs
        # scp /root/.acme.sh/susedojo.com/ca.cer root@control:/etc/cloud/ssl/certs
        # scp /root/.acme.sh/susedojo.com/fullchain.cer root@control:/etc/cloud/ssl/certs
        # scp /root/.acme.sh/susedojo.com/susedojo.com.key \ root@control:/etc/cloud/ssl/private
Procedure 3.13. Set Up Issued Certificates in Crowbar Barclamps
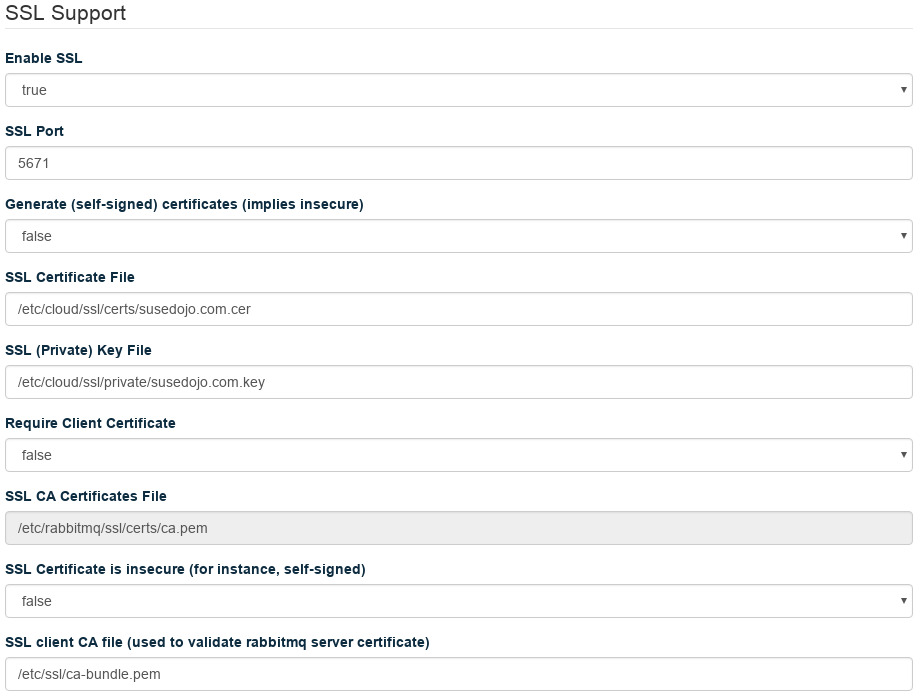
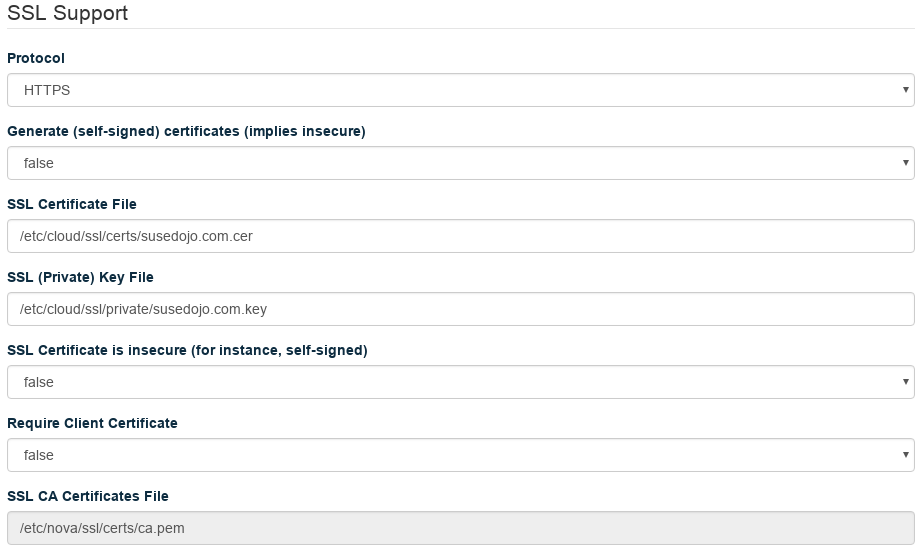
Set your Certificate File and Key File to the proper location, and set the CA Certificates File to the
/etc/ssl/ca-bundle.pemin the distribution. Make sureGenerate (self-signed) certificatesis false, andCertificate is insecureis false.Click . Your changes will apply in a few minutes.
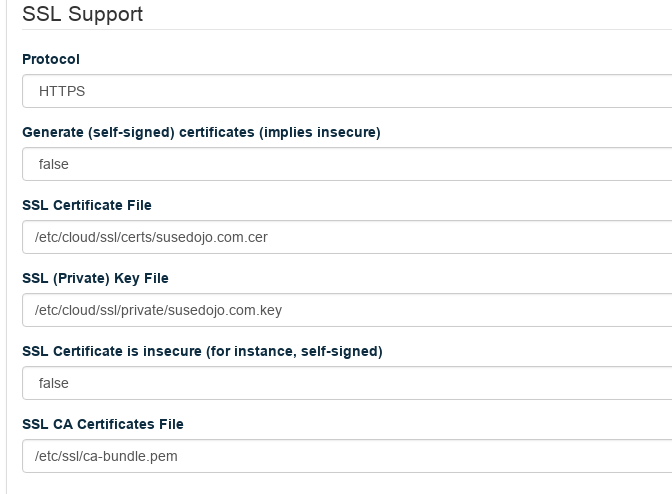
Set your Certificate File and Key File to the proper location, and set the CA Certificates File to the
/etc/ssl/ca-bundle.pemin the distribution. Make sureGenerate (self-signed) certificatesis false, andCertificate is insecureis false.Click . Your changes will apply in a few minutes.
Set your Certificate File and Key File to the proper location, and set the CA Certificates File to the
/etc/ssl/ca-bundle.pemin the distribution. Make sureGenerate (self-signed) certificatesis false, andCertificate is insecureis false.Click . Your changes will apply in a few minutes.
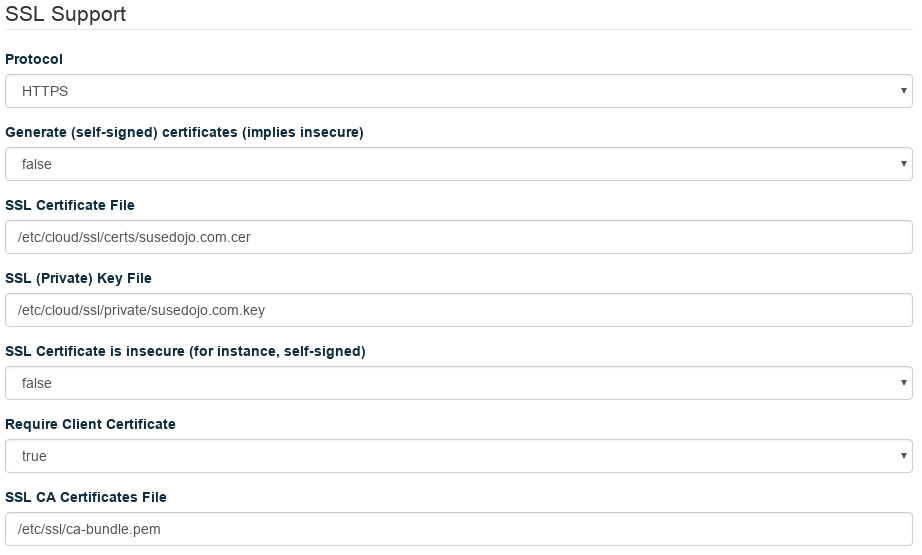
Set your Certificate File and Key File to the proper location, and set the CA Certificates File to the
/etc/ssl/ca-bundle.pemin the distribution. Make sureGenerate (self-signed) certificatesis false, andCertificate is insecureis false, andRequire Client Certificatesis true.Click . Your changes will apply in a few minutes.
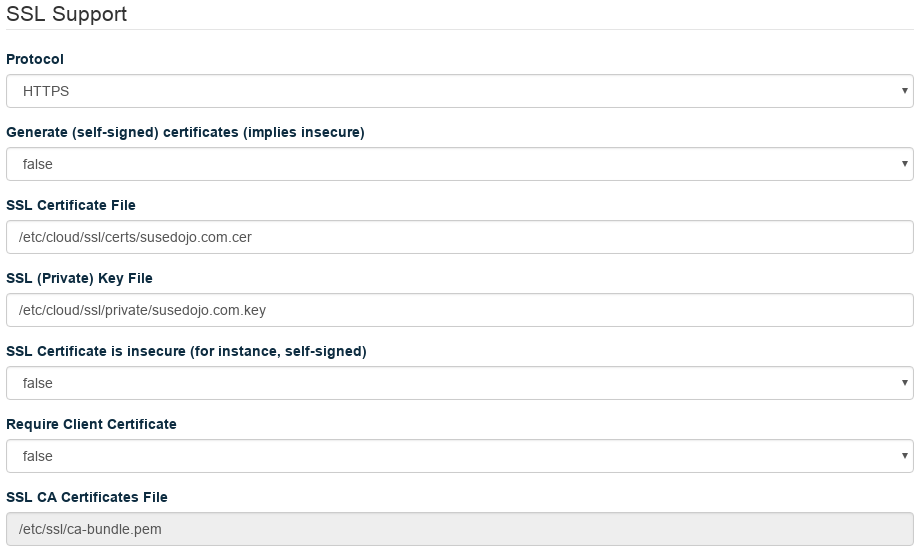
Set your Certificate File and Key File to the proper location, and set the CA Certificates File to the
/etc/ssl/ca-bundle.pemin the distribution. Make sureGenerate (self-signed) certificatesis false, andCertificate is insecureis false, andRequire Client Certificatesis false.Click . Your changes will apply in a few minutes.


Each Crowbar barclamp that have SSL support are the same. You can change the same settings and apply your certificate to the remaining barclamps.
Note
Once this is completed, we recommend automating this process as the
Let's Encrypt certificates expire after 90 days.